6 Tips for Growing Seeds Indoors
After years of year-round growing, I have a wealth of experience on how to starts seeds indoors; I also have sad memories of my initial failed attempts. Over time, I have learned that planting seeds indoors is easy; keeping them alive is a challenge. Equally, growing seeds indoors helps you save money, but you only gain the benefits when the seedlings live and develop into healthy plants.
Starting seeds indoors is a practical approach to getting a jump on your gardening activity early in the season. Planting seeds indoors implies controlled growth conditions, the absence of aggravation from unfavorable weather or weeds, and an early start to the gardening season. Whatever your ultimate goals are, whether it is to grow lettuce during early fall, squash in summer, or onions as winter closes, developing the right skills on how to start seeds indoors is necessary.
A general pointer is to start off small and keep it simple. Every plant has unique requirements in starting its seed. Don’t start with too many different varieties. My favorite seedlings to start indoors for beginners are:
- Marigold
- Tomato
- Nasturtium
- Coleus
- Zinnia
Equally, ensure your timing is right. The objective of growing seeds indoors is to transplant the seedlings from indoor pots to outdoor gardens the moment the weather is favorable. With these pointers, you are ready for our 6 tips for growing seeds indoors. Let’s go!
1. Choose the Right Container

Starting seeds does not require special containers. In fact, anything that measures two to three inches deep with drainage holes is appropriate. If you firmly believe in DIY techniques, then you will find paper cups, milk cartons, and yogurt cups perfect for upcycling.
However, individual trays designed for seed starting are highly convenient. These trays are easy to fill, and they ensure consistent moisture due to their watering system. They can also be moved around more easily.
Sow your small seeds into shallow seed trays, bigger seeds in a modular plug tray where each seed has its module, and large seeds into 9cm diameter pots.
2. Prepare your Compost or Potting Soil
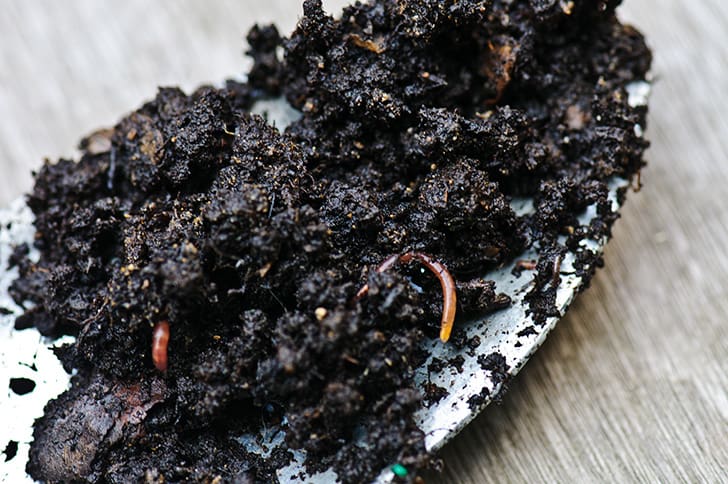
Your potting soil will determine your success in planting seeds indoors. It is advisable to use standard and proprietary soil-less or soil-based seed compost when sowing your seeds indoors. The compost should contain few nutrients and be finely milled to minimize seed damage. Fill your container with the compost. Firm gently, level, and water the container accordingly.
Avoid reuse of previous houseplant pots as well as soil from the garden. I recommend a fresh and sterile mix for disease-free and healthy seedlings. Use a tub or a bucket to moisten your potting mix. Avoid making the mix gloppy and sopping wet.
3. Sow Your Seeds
Determine the form of sowing treatment appropriate for your seeds. This could be scarification through nicking or scratching their seed coats, or light exclusion. Each seed packet includes planting instructions.
Scatter-sow small seeds over the compost surface. If your seeds are tiny, you can mix them with sand before scatter-sowing to ensure that they are evenly distributed. Then, sift a compost layer over your seeds.
Station-sow larger seeds by pressing individual seeds into the compost surface while placing them one inch apart in your seed tray. Or, sow each seed in a separate plug if you decide to use a modular plug tray. You can opt to plant two seeds in every plug and discard the weaker seedling upon germination.
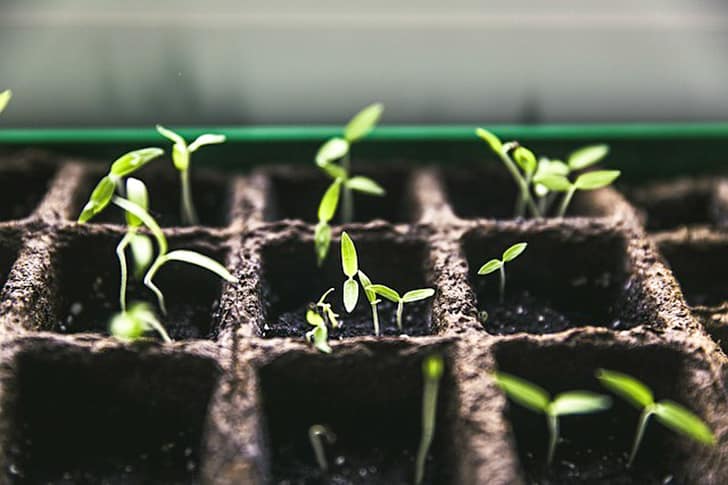
Label each tray, water lightly, and cover the compost with plastic domes or wraps. You can also place your tray in a heated propagator designed with a lid. A constant temperature of about 64F (18C) should be maintained unless stated otherwise on the seed packet. Covering and providing heat triggers germination through keeping the seeds moist.
Check to see if your seedlings have emerged on a daily basis. Once germinated, enhance ventilation by removing the propagator lid or plastic wrap. Ensure the compost is moist throughout to promote steady growth before the seedlings are ready for transplanting into bigger pots.
4. Water and Feed your Seedlings
While your seedlings are growing, keep the compost moist with a small watering can. The soil should be allowed to dry before you water again. You may use a fan to promote good air circulation and plant health. If you use grow lights, plug your fan into the same timer. You also need to feed your hungry seedlings with liquid fertilizer regularly. Use mixture ratios suggested on the seed packet.
5. Provide Adequate Light
Seedlings require a lot of light to avoid being weak and leggy. For natural sunlight, southern windows are the best. Remember to rotate your pots regularly, so the plants do not lean into the direction of light. You can also use grow lights which are easily adjustable for sufficient and consistent light. Place the lights a few inches above your seedlings and illuminate for fifteen hours on a daily basis. You should then turn off the lights to give your plants darkness during which they can rest. Raise the grow light higher as the plants grow taller.
6. Transplant your Seedlings Gradually
Prick out your seedlings by loosening the compost around the roots. Lift each seedling by individually holding its true leaves. Ensure you retain as much compost on the roots as possible. Use a dibber to prepare a hole for your seedlings in their new compost pots. The seedlings should be transferred into 3.5-inch diameter pots.
Keep watering the plants gently, so you do not damage them. As the plants grow large, try flooding while watering, so the entire compost depth is soaked. Liquid fertilizer should be applied every two weeks to a month, although weekly application is recommended for larger plants.
Encourage branching in thin ornamental seedlings by pinching out their shoot tips. Avoid overly warm and bright conditions to discourage plants from growing leggy.
When the plants are ready following weeks of care, you may proceed to the hardening off stage. A week before their final outdoor planting, nurture your plants in a protected outdoor spot. Expose your plants to gradual sunlight over seven days. Consider hardening your plants off in a cold frame.
Things to Watch Out For
- If your seedlings rot, it could be a sign of overwatering
- Fertilizer and water shortages trigger plant stress
- Lack of feed triggers pale, lower leaves
- drought stress triggers dull foliage
However, if you follow the above tips, chances are you will get healthy and vigorous plants from your seeds.