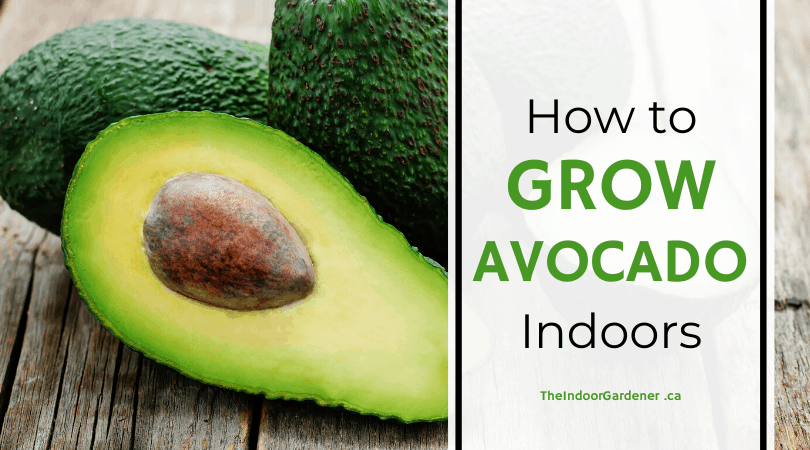
If you’re a fan of avocado toast, guacamole, or another avocado-featuring food, the idea of having your own supply of avocados might seem enticing. Luckily, it is possible to grow avocado indoors, allowing anyone to add them to an indoor garden.
But anyone who tries to grow avocado indoors is going to face some challenges. If you want to increase your odds of success, here’s what you need to know.
How to Grow Avocado Indoors
The avocado tree is native to Mexico and needs a warmer climate to thrive. For those who live in colder regions, that may make growing one indoors is your only viable option. Otherwise, if your local temps dip below 50 degrees Fahrenheit, your avocado plant probably won’t survive the winter.
The overall process is relatively straightforward, though it does require some effort. Here’s a step-by-step guide on how to grow avocado indoors.
1. Getting the Pit to Root and Sprout
After you enjoy an avocado, clean and dry the pit. Take a mason jar (or similar glass container) and fill it nearly to the brim with water. Identify the broad end of the pit and point it towards the water.
Next, take three toothpicks or wood skewers and push them into the pit, creating a way for it to be suspended so that only one inch of the pit is in the water. Find a nice, warm spot in your home that gets indirect sunlight, and set the jar with the pit in it there.
Then, keep an eye on the jar. Add water as necessary to keep the level high enough. Within two to six weeks, you should start to see roots and a stem. If you don’t wait up to eight weeks. If there’s still nothing, then you may need to start over with a new pit.
2. Initial Growth and Upkeep
Now that you see roots and a stem, it’s time to promote healthy growth. Once the stem hits about seven inches tall, cut it back by around half.
After that, wait for the roots to grow thick and for the stem to sprout leaves again. When that occurs, it’s time to plant the avocado in soil.
3. Planting the Avocado in Soil
Planting the avocado is fairly simple. Get a pot that’s largest enough to allow it to grow, usually at least 10 inches in diameter. The pot also needs good drainage, as the roots can get damaged if they are over-saturated for too long.
In the same vein, opt for fast-draining potting soil, such as one designed for cactus or succulents. It will help keep the moisture levels appropriate. If you’d like, you can put some courser stones at the bottom, facilitating good drainage.
Fill the pot loosely with soil and then make a hole for the seedling. Spread the roots out carefully and then pack the soil gently around the pit. Keep the top of the seed above the soil line as you work, and water thoroughly once complete.
4. Maintenance of Your Avocado Plant
Avocado trees need good sunlight, ideally full sun. When you grow avocado indoors, they usually do best in a south-facing window, as those typically get the most sunlight. However, if you don’t have a south-facing window or yours are shaded, try the brightest spot you can use.
When it comes to watering, you want the soil to be moist, but not soaked. If the leaves begin to yellow, you’re overwatering, so use that as a sign to back off a bit. Usually, you can wait for the leaves to show just the subtlest signs of wilting. Then, give it a good watering, and wait for that slight wilt before doing so again.
When your seedling hits about 12 inches in height, trim the tip and top leaves off. Strive to cut just above the closest growth node. Additionally, as the stems reach six inches, do the same. That will encourage fuller growth, essentially making the plant a bit bushier over time. While you’ll pinch off new growth regularly throughout the first summer, once the plant is a year old, it may only need pruning once a year.
Every few months, use citrus tree fertilizer to assist with growth. Just make sure you don’t go too heavy. You may also want to use a trace elements spray every few months during the warmer seasons.
If You Grow Avocado Indoors, Patience is a Must
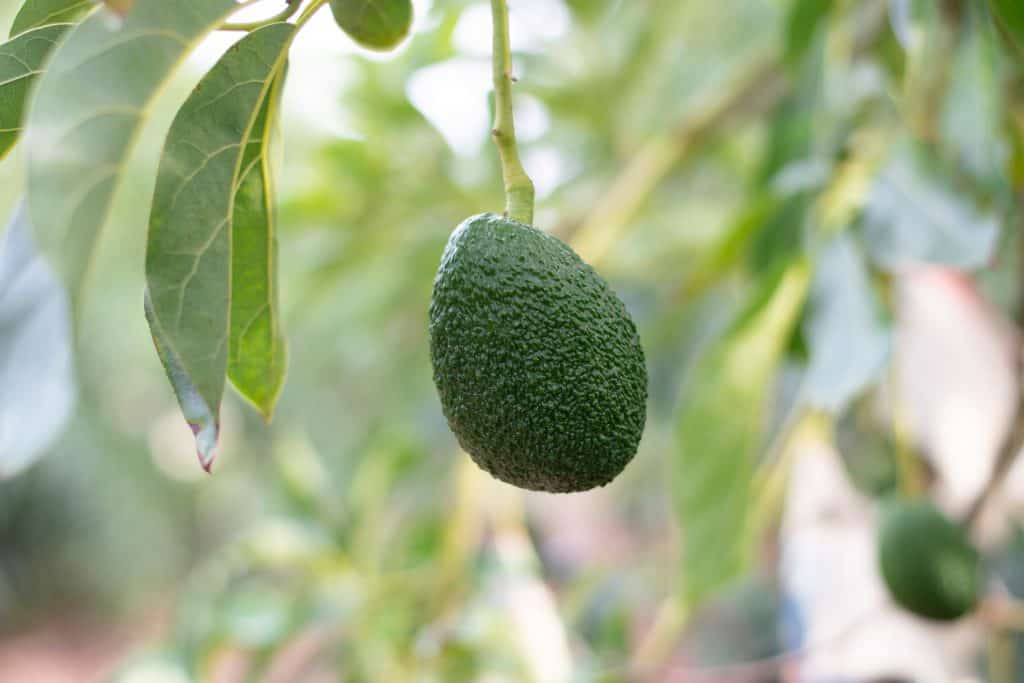
It’s important to note that, even under the best of circumstances, an avocado tree might not fruit for at least ten years. In fact, some take much longer.
Additionally, the vast majority of avocado trees that remain entirely indoors will actually never fruit. Instead, they are more of a novelty houseplant.
However, you can move an avocado tree that’s started indoors outside. If your climate is appropriate, it’ll then have a chance to grow fully, increasing the odds that it will fruit. Otherwise, you can keep your fingers crossed that your avocado tree is an exception. Just be prepared that it may take a decade or more for you to find out.
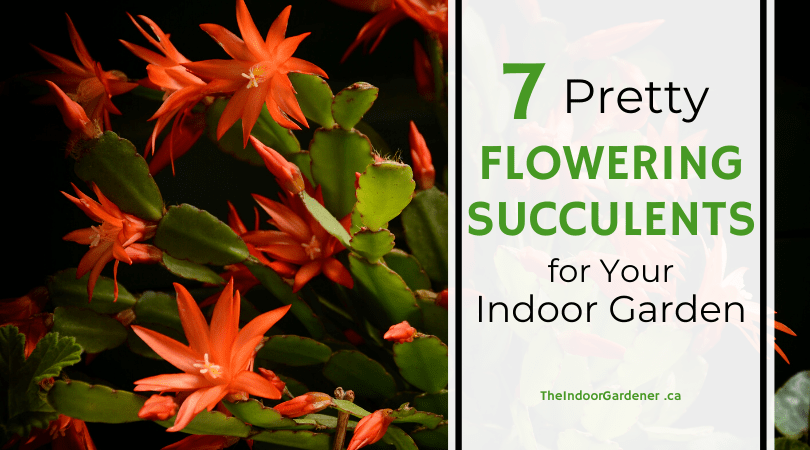
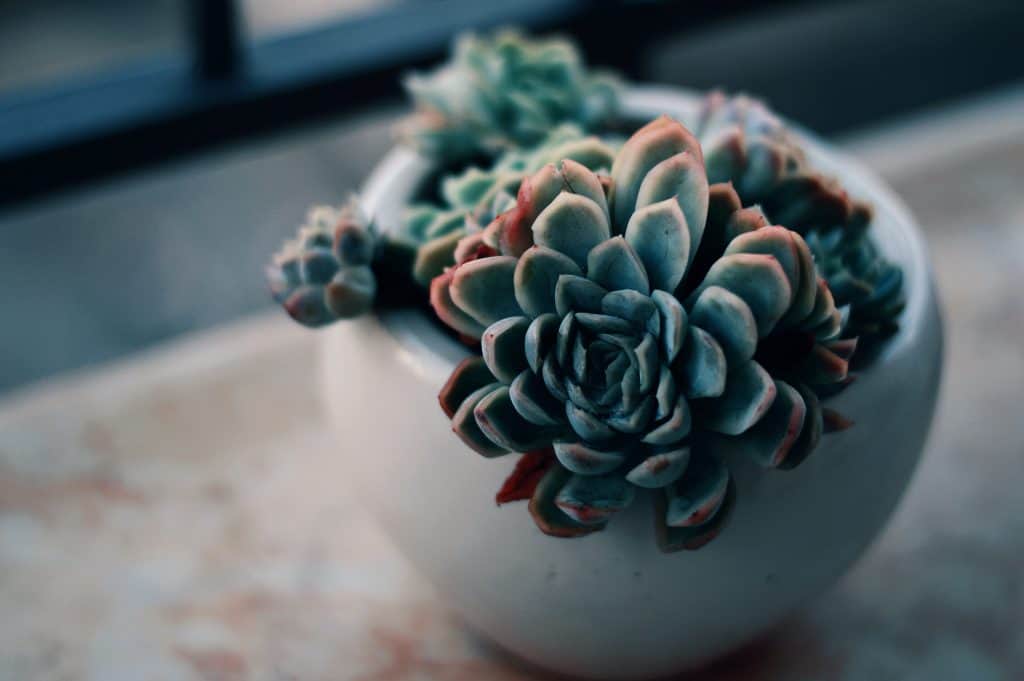
7 Pretty Flowering Succulents for Your Indoor Garden
Flowering succulents can be a great addition to any indoor garden. Often, they are incredibly low maintenance, making them ideal for anyone who doesn’t think they have a green thumb. Plus, they add spectacular colours to your interior.
If you enjoy the look of live flowers but prefer to have living plants that don’t require too much attention, flowering succulents can be the way to go. Here’s what you need to know about flowering succulents for indoor gardens as well as a few species worth considering.
Why Plant Flowering Succulents in Your Indoor Garden
When most people picture succulents, plants with glossy, bright green foliage and stunning texture usually come to mind. But there are also a wide variety of flowering indoor succulents, allowing you to imbue fantastic colour into your indoor garden landscape.
Like the non-flowering versions, most flowering succulents are incredibly low maintenance. They don’t require much watering or care to be at their best. Additionally, they come in a range of sizes. You can group several together in a large pot to create a breathtaking display or opt for single plants to create your ideal look.
Ultimately, the low care needs and stellar colouring make flowering succulents a worthwhile addition to your indoor garden. Just make sure that you review the care instructions to keep yours in the best shape possible.
7 Beautiful Flowering Succulents for Your Indoor Garden
If you aren’t sure which flowering succulents might meet your needs, here are seven worth checking out.
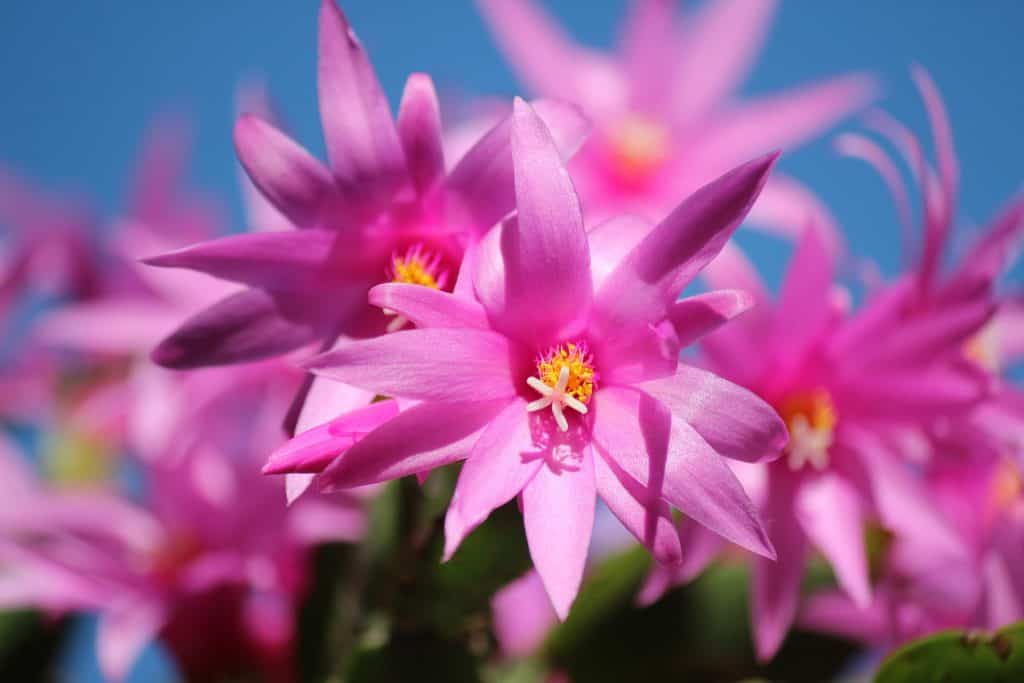
1. Christmas Cactus
With proper care, a blooming Christmas cactus has large flowers in warm colours, usually ranging from purple to red to pink. Since the bulk of the plant is a vibrant green, the blossoms stand out.
Caring for a Christmas cactus isn’t overly complicated. In general, these plants like to be a bit root-bound. As far as watering, you can typically wait until the topsoil is dry before adding any more water.
2. Crown of Thorns
If you want a prolific bloomer, the Crown of Thorns is a great choice. As a flowering succulent, it’s care needs are minimal. The somewhat waxy green leaves serve as an amazing backdrop for the vibrant blooms, which typically come in with magenta hues and delicate yellow centers.
Growing a Crown of Thorns successfully isn’t a significant challenge. As a result, it can be a great plant for beginning indoor gardeners.
3. Pincushion Cactus
If you prefer your blooms bright pink, the Pincushion cactus might be the flowering succulent for you. Growing one is a breeze thanks to the plant’s drought-tolerant nature. You really don’t have to worry about watering too much, as the soil can get a bit dry in between watering.
However, you do need to make sure your Pincushion cactus can get about four hours of direct sunlight a day if you want it to thrive. Additionally, it is a spiny cactus, so you do need to exercise caution when watering or handling, and keep it away from curious children or pets.
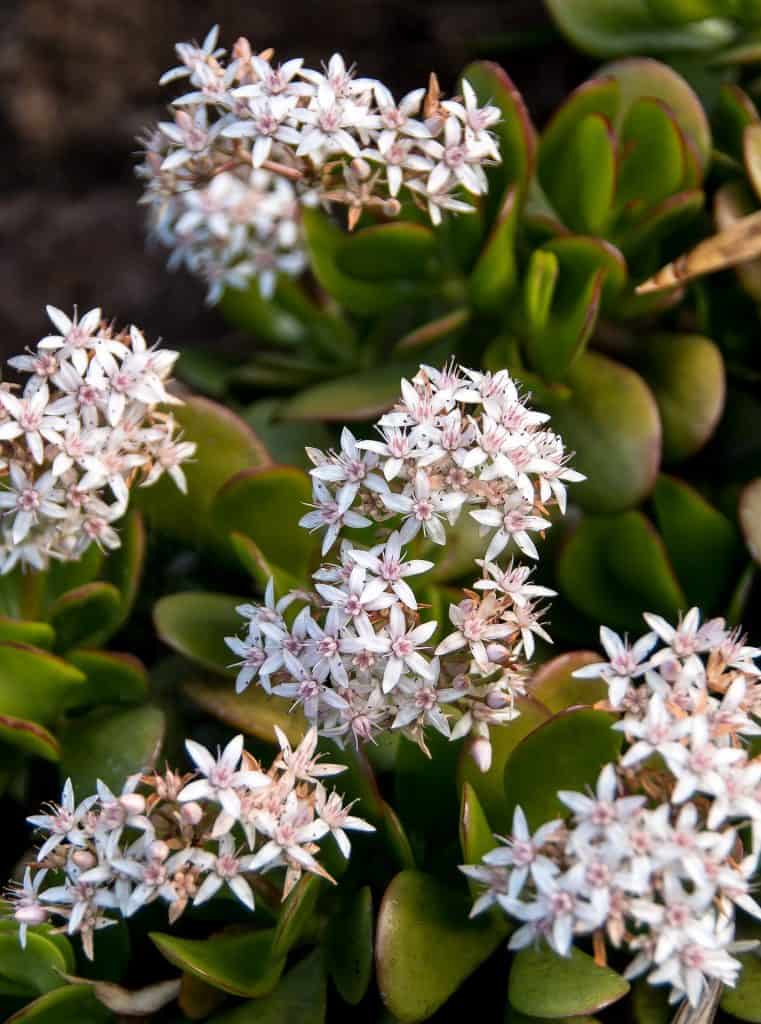
4. Jade Plant
If purple is more your thing, the Jade plant can be a great flowering succulent for your garden. Many of these succulents bloom in shades of lavender, which stands out against green foliage. Others have white or pink flowers, so you’ll want to see if you can get a look at the blooms before you buy one.
Plus, the Jade plant is a great option for beginners who want a larger plant. It’s incredibly hearty and requires very little care, but can reach heights of three to four feet even when grown indoors.
It can be a bit tricky to encourage Jade plants to bloom indoors. However, it isn’t so difficult that most indoor gardeners can’t make it happen in the late winter or early spring.
5. Marble Buttons
For those who would prefer to stay away from pink hues, the Marble Buttons is a great choice. Along with the unique marble-like plant structure, you get terrific orange-hued flowers. Some bloom closer to yellow while others lean towards a deeper orange. However, the colouring is always reminiscent of autumn.
6. Red Yucca
While it looks a bit more like an ornamental grass than a succulent, the Red Yucca is a beautiful flowering succulent. The flowers come in on thin stalks, usually in vibrant red tones.
The Red Yucca usually does best in hot climates and outdoors. But, if it has access to a bright, sunny window, you can grow it inside. Just understand that it’s highly drought tolerant and capable of handling extreme heat, so you want to avoid overwatering and try to make sure it’s warm enough to flourish.
7. Peanut Cactus
Another flowering succulent with bright orange or white blossoms, the Peanut cactus is compact but offers quite a visual punch. The flowers are surprisingly large for the plant’s size, making it a fun addition to an indoor garden. Plus, it’s easy to care for, making it a low maintenance option.
Unlike many other cacti, the spines on the Peanut cactus are mainly smooth. As a result, it doesn’t pose much of a danger to children or pets. Just make sure you place it in a sunny spot if you want it to thrive, particularly if you live in a cooler climate.
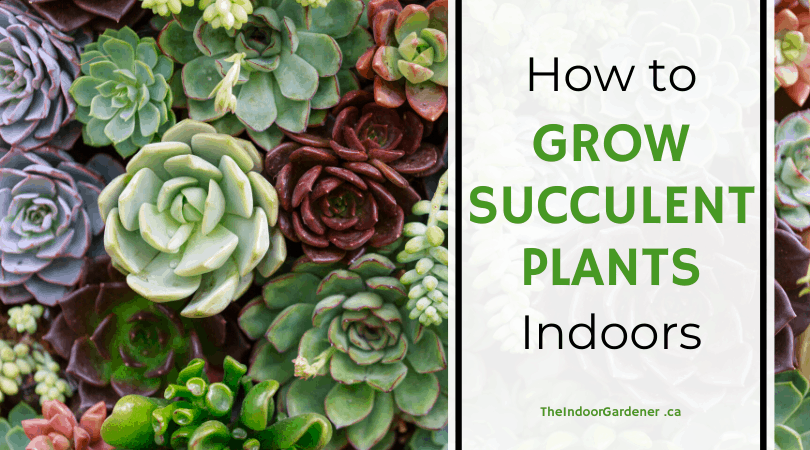
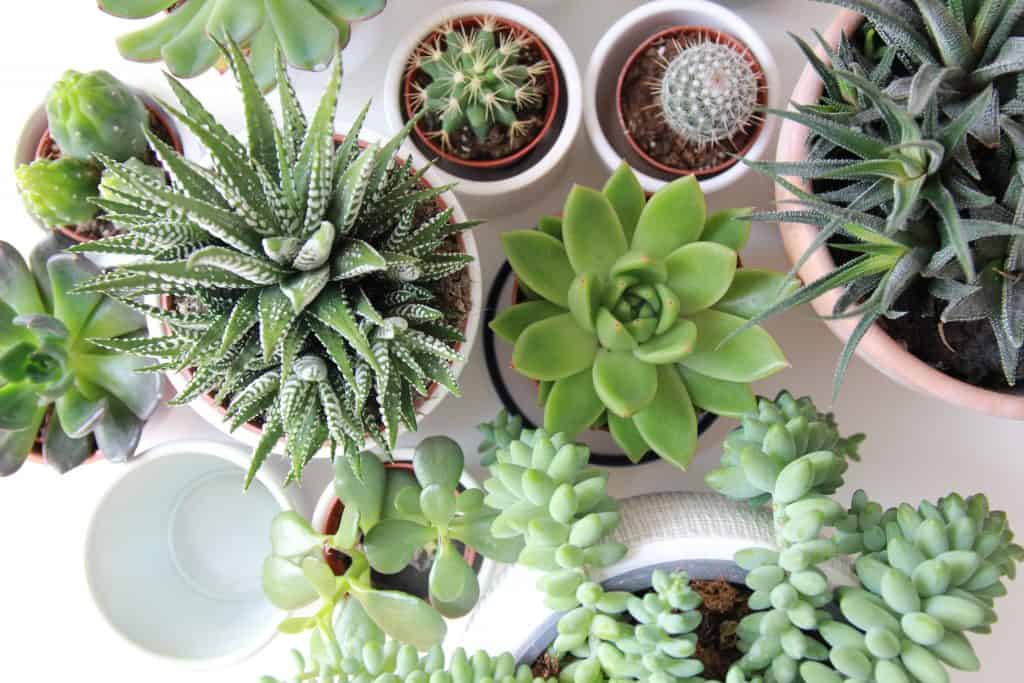
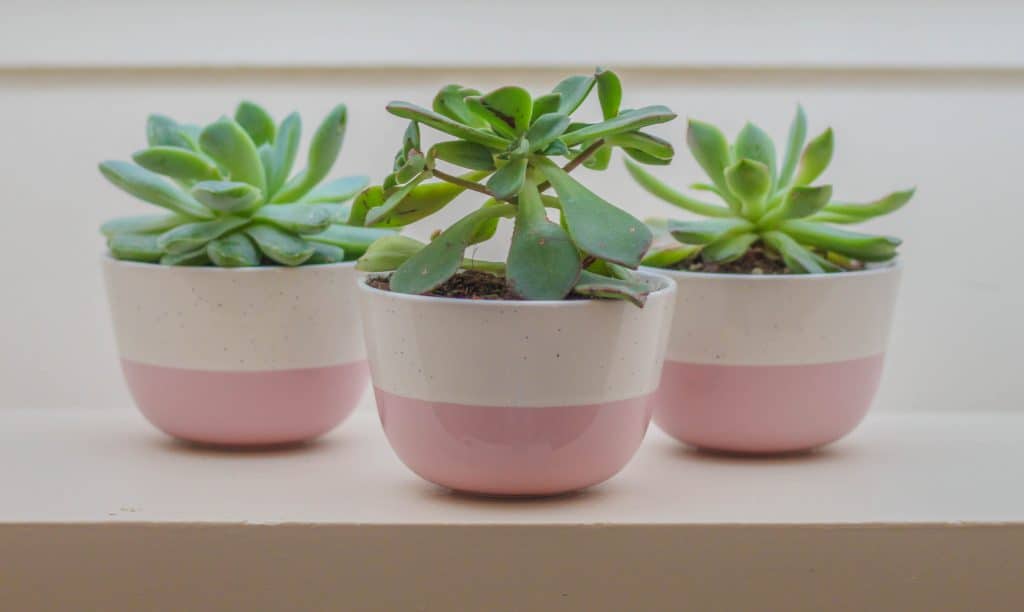
Many people adore succulents. They are fairly easy to care for, making them great options for indoor gardeners who are just starting out. But even experienced plant growers appreciate the low-maintenance nature of succulents. If you want to grow succulent plants indoors, here’s what you need to know.
How to Grow Succulent Plants Indoors
Growing succulents indoors isn’t overly challenging. However, you want to use the right approach to ensure your succulent plants remain healthy and get a chance to flourish. Having the best soil for indoor succulent plants, choosing the right pot, and giving them the proper care are all essential for indoor gardeners. Here’s how to make sure you hit the right marks.
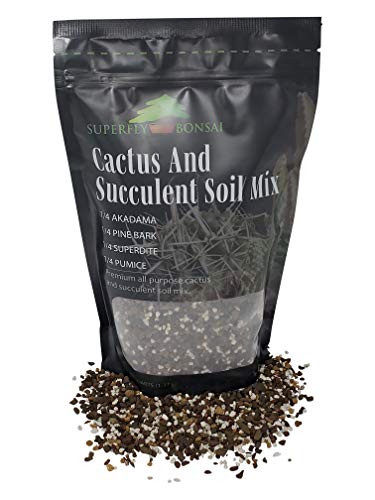
Choosing the Best Soil for Indoor Succulents
The best soil for indoor succulents is one that facilitates drainage. Succulents aren’t designed for incredibly damp soil, as they are native to drier environments.
In many cases, your best bet is to start with a ready-made cactus or succulent potting soil mix if you want to grow succulent plants indoors. At times, that alone might be enough, particularly if your indoor environment is fairly dry. Here are a few options that can work:
However, if you’re worried about moisture, you can go a step further. Adding in some extra grit, sharp sand, pumice, or perlite can ensure proper drainage. Plus, those materials don’t break down over time, so you won’t have to worry that the soil won’t be ideal in the coming years.
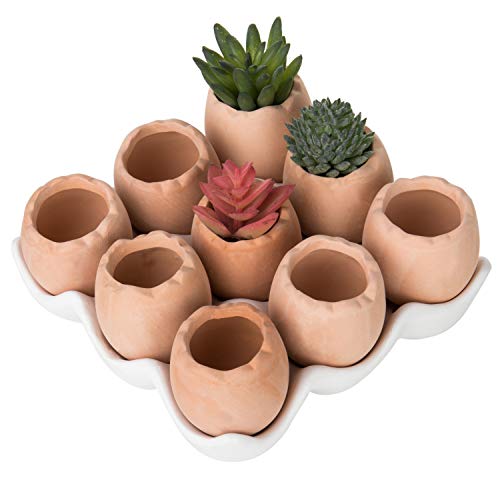
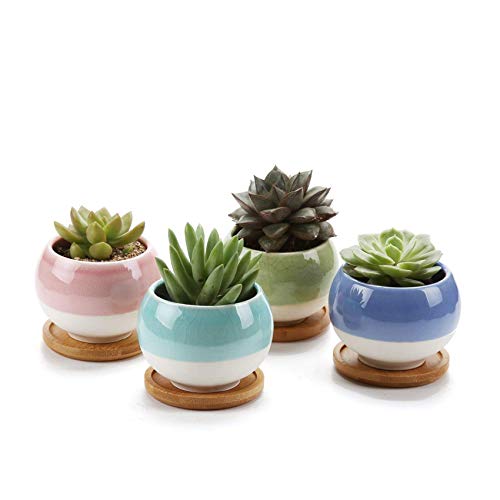
The Best Pots for Indoor Succulents
When you choose pots for indoor succulents, the process isn’t unlike other indoor plants. Along with good drainage holes, you want to make sure they are the right size. Without ample room, your succulents might not grow as well as you’d like.
Additionally, look for breathable pot materials. Options like ceramics and terra cotta are ideal, as succulents prefer good airflow around their roots, and those will do that job best. Otherwise, you might find your succulents are plagued with root rot.
If you’re looking for some solid choices, here are a few to consider:
Offering the right level of care to your succulents usually means backing off a bit. These plants are hardy by nature, so you don’t have to coddle them like you would with an African violet. Essentially, you only want to water them enough to prevent them from shriveling up.
In most cases, you’ll want to water them to the point where the soil can dry out fairly quickly. Then, after the soil has been dry for a few days, water again, and repeat. Whatever you do, don’t water daily. If you do, there’s a good chance you’ll overwater, and your succulents will die.
Additionally, you want to ensure dissolved minerals or fertilizer residues don’t build up. If you use rainwater or distilled water on your succulents, that can make sure that it doesn’t happen. Usually, you’ll only need to add fertilizer annually, particularly if you live in an area with colder and darker winter months. Just add some in the spring or summer.
Now, the one area where you need to be diligent is lighting. Indoor succulents require a significant amount of sunlight. Make sure to place the pots in windows that get a few hours of daylight each day. If you’re worried about scorching, opt for a west- or south-facing window and use a sheer curtain to filter some of the light. For succulents that aren’t prone to scorching, an east-, west-, or south-facing window can work, with or without a sheer curtain.
Things to Consider with Indoor Succulents
Different succulents have different needs. When you are choosing plants, you want to make sure that you select succulents that can thrive in your indoor environment.
In most cases, brightly coloured succulents – such as the red and purple varieties – require the most sunlight. If you have windows that bring in a ton of sun, those can be great choices. But, if you don’t have a great window or the amount of sunlight that comes through during the winter months is low, opt for green succulents or look for options that have lower light needs. That way, you can keep your succulents healthy and vibrant.
Additionally, be aware that even well cared for succulents can experience some shriveling. Like other plants, leaves may die on occasion. If you are only seeing it on the lower leaves (those near the soil), you could just be experiencing what happens naturally. Just be aware that shriveling near the top or center of your succulent could indicate a problem, such as over- or under-watering.
But, if you follow the tips above, anyone can grow succulents indoors, including inexperienced gardeners. With the right soil, pots, plants, and care, you can maintain a vibrant succulent garden inside, no matter where you live.
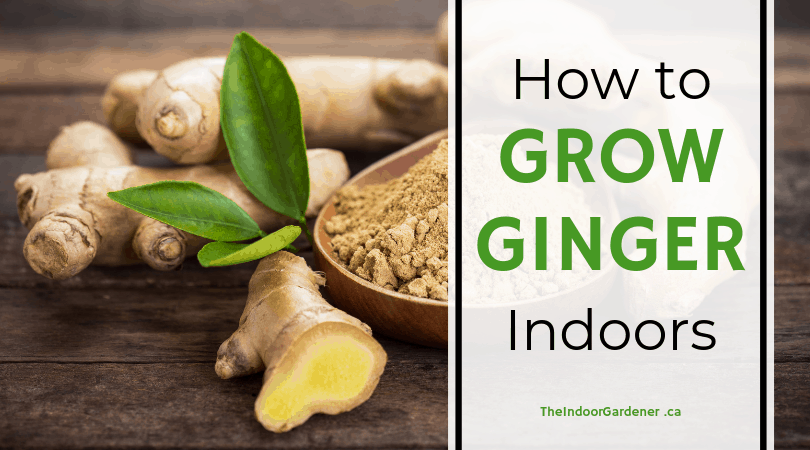
Ginger is an amazingly aromatic and potent spice. It’s commonly used in Asian cuisine, but also makes an appearance in teas, smoothies, and more. Plus, it’s said to ease an upset stomach, making it handy to have on-hand. Many people prefer ginger when it’s fresh, so finding a way to grow ginger indoors is ideal.
As with many herbs and spices, having access to a fresh source allows you to experience the best of what ginger has to offer, ensuring you can experience the full flavour and natural texture. Luckily, growing ginger indoors is surprisingly easy. Here are some tips that can help indoor gardeners keep a reliable supply of ginger all year-round.
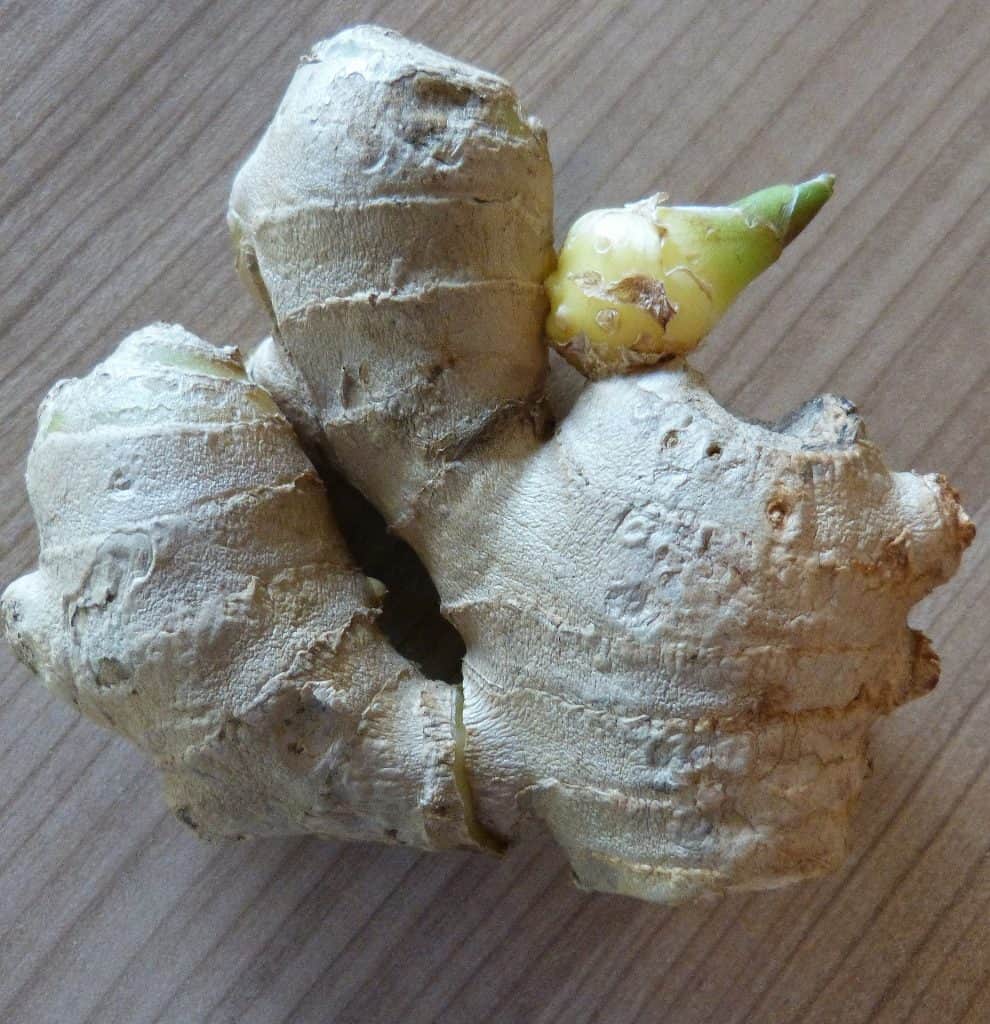
Start with Live Ginger Root
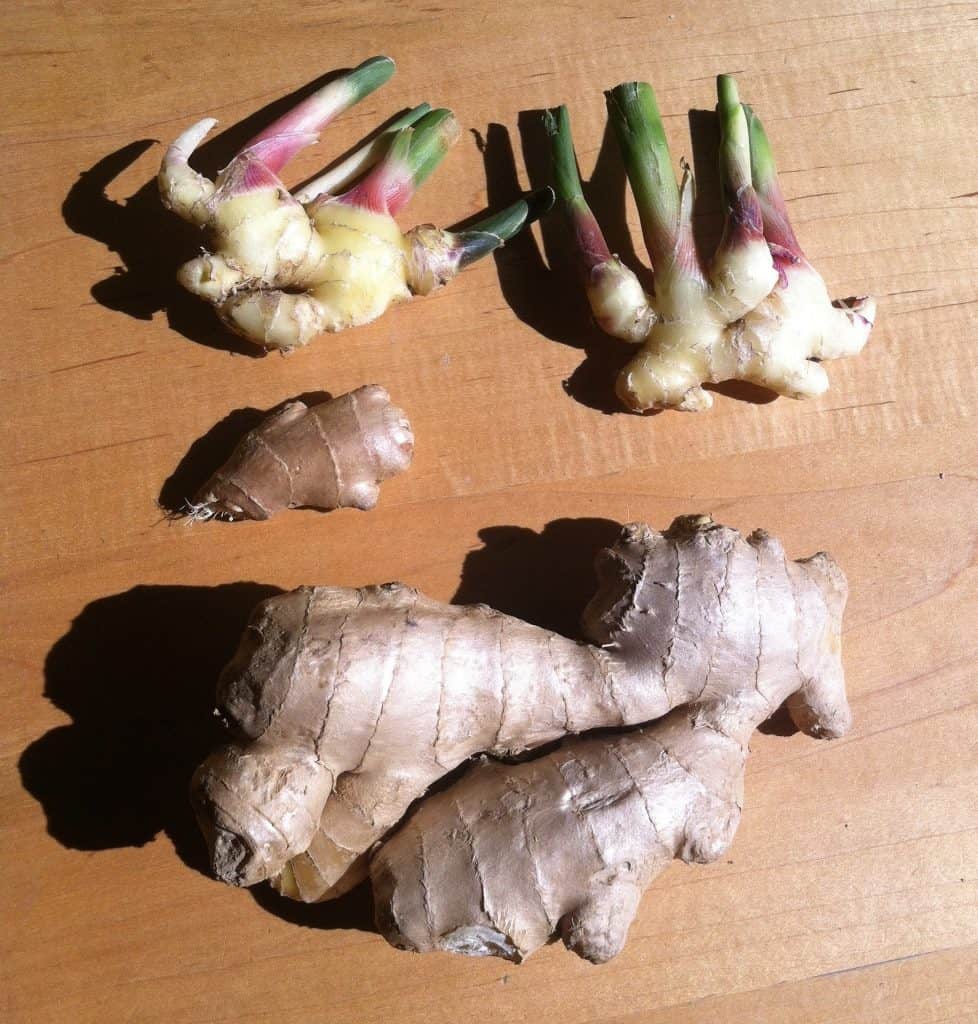
If you want to grow your own ginger, you need a living root. Usually, you can find ginger at nurseries or garden centres. Select a root that is plump and firm, preferably with tight skin and multiple eye buds. You can cut the root at each eye bud, giving you the ability to get several plants from that initial root.
If you struggle to find it locally, consider heading online and searching for a seed company or nursery that will ship. Just keep in mind that you won’t be able to select your piece, so you might not get as many eye buds this way.
Preparing to Grow Ginger Indoors
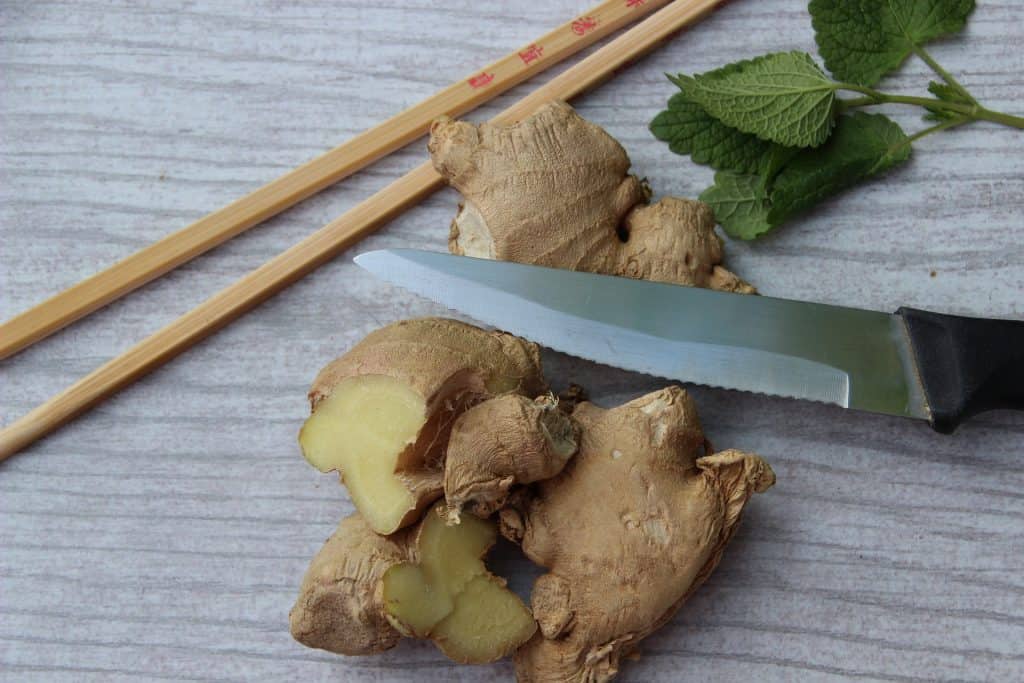
Before you plant your ginger root, you need to prep it. If you have several eye buds, you can section the root by cutting it into pieces. Just make sure every piece has at least one eye bud, allowing it to become its own plant. Then, soak the roots in warm water, preferably overnight.
You also want to make sure that you have the right planter available. Since ginger grows horizontally, you need a wide pot that’s a bit on the shallow side (usually around 8 to 12 inches deep is sufficient). Additionally, look for planting soil that is rich and drains easily.
Planting the Ginger Root
After the ginger has soaked, you can start the planting process. Take your pot and put a 4-inch layer of soil in it. Make sure that you have at least 3 to 4 inches of room between the top of the soil and the upper edge of the pot.
Next, place the ginger root onto the soil and make sure that the eye bud faces up. Cover the root with 1 to 2 inches of soil. As you plant, keep each root piece 6 to 8 inches apart. That way, they have room to grow properly.
Once all of the pieces are in place, water the soil well. While you don’t want the soil to be soaking wet or to have visible pools on the surface, it should be moist once you are done.
Then, move the pot to a warm spot that doesn’t get too much direct sunlight. Usually, you’ll need the temperature in the room to remain between 60 and 90 degrees, including overnight, so keep that in mind when choosing a location.
Keeping the Ginger Growing
Now that your ginger is planted, you need to make sure it has everything it needs to grow. Make sure to monitor the soil and only water it when it is no longer moist. Overwatering can be harmful to ginger, so the soil should never be soaked. However, since it thrives in tropical environments, dry soil isn’t great either, so it’s a bit of a balancing act. If you mist the soil with a spray bottle, it’s typically easier to stay in the sweet spot.
Be patient as you wait for your ginger to grow. Ginger is notoriously slow, so it could take two to three weeks for shoots to emerge from the soil. Plus, it will take even longer for it to be harvestable.
As the root grows, ginger rhizomes – the portions of the root that is used as a spice – may emerge through the surface of the oil. When this happens, get a little more potting soil and cover the exposed area to protect it from the sun. Otherwise, that little section may turn green, and it may not be as flavourful.
Every month, it’s also wise to add some compost to the pot. Just sprinkle a few inches on top and mist it with a spray bottle.
Harvesting After You Grow Ginger Indoors
In a few months, once the stems above the soil reach a height of about 3 to 5 inches, you can harvest some of your ginger. Go to the edge of your pot and gently push some of the soil aside. Once you find a rhizome (a piece of the root that will grow indefinitely with proper care) use a small knife to remove some of the ginger.
Alternatively, you can lift an entire section by holding the shoot near its base and pulling it from the soil. Then, trim a piece of the root, put the plant back in the pot, cover the rhizome with soil again, water it heavily, and be gentle with that area for a few days.
By only taking enough ginger to handle your needs at the time, you can maintain a near-endless supply in your indoor garden. Just make sure to keep up with the watering, and add compost monthly to ensure the health of your plants.
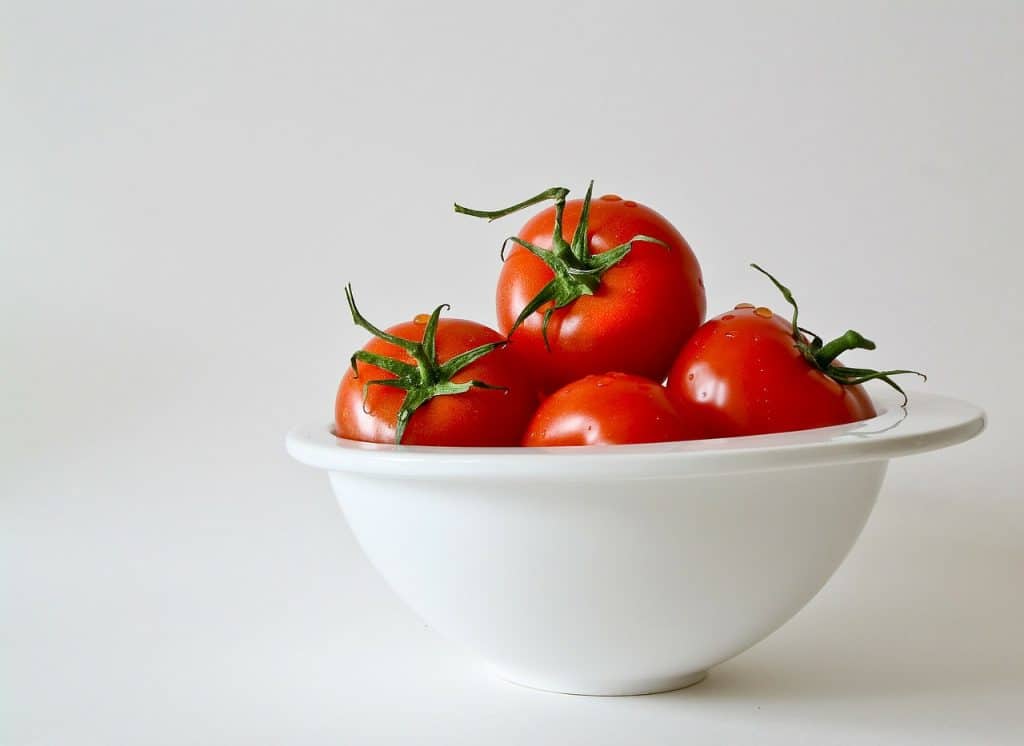
No matter whether you are making meatloaf, a salad, spaghetti, or french fries, chances are you will find that tomatoes represent at least one key ingredient. Unfortunately, if you go to the supermarket, or even a roadside vegetable stand, you may wind up purchasing tomatoes that have pesticides on them, or other unhealthy chemicals. Growing your own organic tomatoes at home and indoors is a great way to have fresh, delicious tomatoes year round. Let’s look at some tips on growing the best organic tomatoes indoors.
Start with the Best Seeds
Depending on the amount of room you have, some tomato varieties may work better than others. As a general rule of thumb, you should look for the following characteristics:
Non-hybrid varieties, so that you can save the seeds from year to year.
Crack-resistant varieties that will enable you to reduce damage to the fruit caused by sudden changes in soil moisture. Some good varieties include Delicious, Black Cherry, Gardener’s Delight, and Sweet 100.
Varieties that produce compact plants, or ones known to do well in containers. Typically, cherry and plum varieties tend to be favored by indoor gardeners, but you can also try beefsteaks.
Lighting
Even though tomato plants are fairly hardy, they require full sunlight. If you live in the Northeast, or some other cold region, you may find that windowsill gardening will not suit your needs. In order to make sure that your plants are getting enough sunlight, you can purchase a light meter from a gardening store. You can also use this meter to determine how many grow lights to purchase if you decide to grow plants away from a window, or in a room with low levels of natural light.
Organic Mulches and Fertilizers
Typically, tomato plants require soil with a good bit of humus in it. Even if you live in a small apartment, you should be able to set up a small bin where you can compost small amounts of kitchen waste. If you do not want to create your own compost, there are also several fertilizer products you can purchase that do not make use of chemicals and synthetic fertilizers. You should also make sure that you can create a form of liquid fertilizer.
Soil pH Management
When you grow plants indoors, pH can shift quickly as plants grow and use up nutrients in the soil. Therefore, you will need to check the pH on a regular basis. As a general rule of thumb, Tomato plants do best in slightly acidic soils. If you can keep the pH between 6.0 and 6.8, it will reduce flower rot, and other problems. Today, there are a number of pH testing metersthat you can purchase in a gardening store or online.
In order to keep pH as steady as possible, you should try to choose, or mix soils that have as much organic content as possible. If pH goes too high, you can add coffee grounds, or if it goes too low, use lime. On the other hand, if you repot on a regular basis, you can most likely avoid having to adjust pH at crucial times.
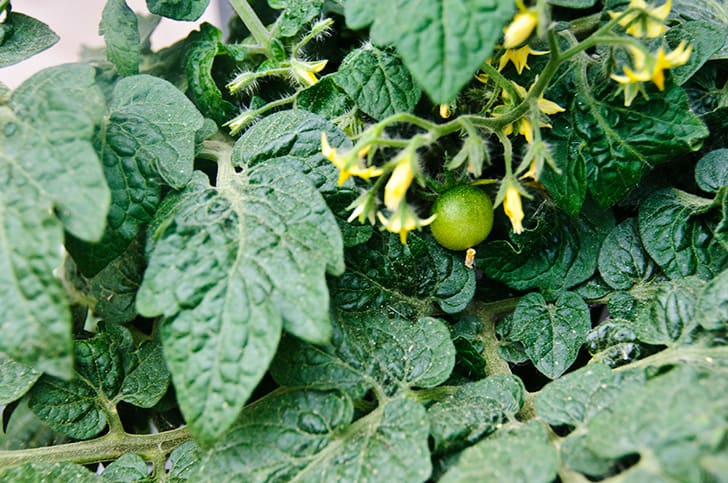
Flowering and Pollination
Each variety of tomato plant will flower within a certain window of time. For example, a variety that takes 80 days to mature should start making flowers around day 60. If that window of opportunity is missed, the plant may not produce flowers at all. Once you know when each plant should begin making flowers, it is very important to increase nutrients via liquid fertilizer, as well as make sure that the plants get enough light. Once the flowers are produced, you will need to shake the plants around noontime in order to ensure pollination occurs. Alternatively, if you are growing tomatoes in warm weather, you can simply put the plants outdoors, and let the wind and bees do the job for you.
Consider Aeroponics for City and Cold Region Dwellers
Aside from taking up a lot of time, repotting plants can also become quite expensive. If you are looking for an economical and efficient way to grow tomato plants indoors, aeroponic gardening offers a number of advantages. This includes using less space than needed for conventional soil based methods, as well as a significant reduction in problems associated with parasites, bacterial infections, and insects.
There is no question that the cost of food will continue to rise as soil depletion and desertification force farmers to pay more for land and fertilizer. At the same time, the incessant usage of dangerous pesticides can easily rob you and your family of several decades of life and well being. Today, you can begin changing that downward cycle by growing organic tomatoes indoors. Once you know how to manage this plant, you can easily begin growing other staples that will help you save money, as well as ensure your long term health.
How to Make the Best Soilless Potting Mix for African Violets
You may well ask why you should use a soilless potting mixture for African violets. It is favoured over soil for the following reasons:
It is challenging to find good topsoil that has no contamination and also has a good supply of all the necessary nutrients.
Topsoil, once taken from the garden, does not retain its drainage because it is no longer part of the ground drainage system. Once it is in a pot, it packs and becomes water-logged.
The most significant advantage of a soilless potting mix is its uniformity and your ability to predict how fertiliser will react.
The components of a soilless potting mix are usually sterilised, and the mix doesn’t have to be pasteurised (a very smelly, messy business) to eliminate any bugs which abound in garden soil and are harmful to African violets.
Soilless components are abundant and easy to find locally in small quantities.
What to look for in a Soilless Potting Mix for African Violets
Your African violets depend upon you to provide them with a satisfactory environment in which to grow. There are numerous variations in potting mixtures which have been used successfully in growing African violets, but all these mixes have the following characteristics:
Must be light, porous and drain well
Does not compact easily
holds moisture and soluble plant nutrients
provides organic matter for soil bacteria to feed on
have slow release plant nutrients
does not require sterilization or pasteurization
plant roots can penetrate mix easily
have a pH between 6.4 to 6.9
The essential characteristic of potting mix is good drainage. It is too late to correct drainage after a plant is potted. Lack of proper drainage is probably the most common reason for poor root growth, root and stem rot, slow leaf growth, and little or no flowering. If your mix doesn’t drain well and isn’t porous, there will be few spaces between particles of the blend for water and air. If spaces fill with water, the mix becomes water-logged and not enough air is supplied to the roots. The plant will begin to die if this condition is not soon corrected. When the mix dries out, spaces fill with air, and the plant lacks water to dissolve and transport soluble nutrients throughout its structure.
The Best Soilless Potting Mix for African Violets
A basic soilless potting mix formula (1-1-1) is one part each of sphagnum peat moss, horticultural vermiculite, and perlite. Another popular mix is (3- 2-1) and there are many more.
Peat moss is recommended because it is coarse, an excellent source of organic matter, decomposes slowly, serves as a reservoir for both water and nutrients, and resists compaction.
Vermiculite and perlite are both coarse, bulky materials that resist compaction and keep the mix loose and well aerated. Vermiculite provides water and nutrient holding capacity and has a high buffering capacity which slows changes in pH. It also permits higher fertilization rates and contains potassium, calcium, and magnesium. Its scaly structure is more easily broken in handling. This can cause compaction and waterlogging.
Perlite doesn’t break up easily but has little capacity to hold nutrients or to buffer pH and has no nutrient value. Perlite is better for aeration. Both vermiculite and perlite are manufactured by heat processes which sterilize them, and they are available in sealed packages that keep them sterile.
Sphagnum peat moss is superior to other types of peat moss which are too fine, compact easily, and get soggy quickly. It is dry, sterile, and packaged to prevent contamination. Peat moss is the mix component which generally contributes most to acidity and has pH varying from 3.5 to 5.5.
Peat moss should be thoroughly wet before being added to the potting mix. This may take several days. If this is not done correctly before potting, the peat moss will be too dry. It is nearly impossible to add enough water to keep it moist and function properly once combined in the potting mix.
When a plant is potted in a mix with peat moss which has not been properly moistened, too much water passes rapidly through the mix and out the bottom of the pot without doing the plant any good. The mix is as dry after watering the plant as before, and the value of fertilizer in the water will be reduced.
To induce peat moss to absorb water, use a neutral wetting agent (surfactant) such as Aqua Soak at a rate of 2 Tbsp. per gallon of hot water. Aqua Soak is neutral (pH 7.0) and is not harmful to plants. Peat moss is placed in a container, Aqua Soak in solution added and peat moss stirred to expedite uptake of water. This process of wetting takes several days and should be completed before peat moss is used in a potting mixture.
If possible test the pH of the sphagnum peat moss before using. This will indicate how much calcium (lime) may have to be added to the potting mixture to raise the pH to between 6.4 and 6.9. Calcium should be in soluble form and finely ground. The finer it is, the better and is quick acting. Use dolomite lime which has magnesium in addition to calcium. Ground limestone (agricultural grade for lawn and gardens) is finely ground and disperses well throughout the mix. Whiting (used in whitewash), and coarse ground eggshells (slow acting) are some examples of calcium.
If the peat moss is too acid — say pH 3.5 – it is challenging to raise the pH to 6.5. Try a different source of peat moss that is not so acid. It took 1 Tbsp. of ground limestone (pH 8.8) to raise 1 cup of peat moss (pH 4.8) to pH 6.3. This reaction was tested with an electronic meter about 15 minutes after being mixed. If this mix with ground limestone added had been allowed to stand for 24 hours before checking, the results would have been better. The pH meter only measures free ions available in solution thus more time would allow the release of more calcium ions to neutralize the acid peat moss ions.
It is recommended a potting mix be allowed to stand for one week before testing and using as more accurate results would be obtained. Usually, one teaspoon of ground limestone per pint of mix should raise the pH to 6.4 to 6.9 if the peat moss is not too acid. Maximum lime should not exceed 1 Tbsp. per gallon of mix, as too much calcium is undesirable.
Use 2 cups of mix (1 pint) when adding lime, to see how much is needed starting with 1/2 teaspoon added to mix when testing for pH. Keep a record of the pH for each increment of lime added thus you can determine how much total lime is needed to raise the pH to the desired level for 1 pint of mix. Then measure the quantity of mix to be treated and figure how much lime has to be added to raise pH to the desired level.
I use Black Magic Potting Mix (pH 6.4) and also Mica Peat (pH 6.2) as the peat moss component in my mix since it requires less lime (calcium) to raise pH to 6.8. Thus a 1-1-1 potting mixture of Black Magic, vermiculite, and perlite would have a pH of about 6.4 without adding any lime.
Charcoal is neutral (pH 7.0) and is added to the mix to neutralize acidity developed later from fertilizer used in watering African violets. To keep the mix from becoming more acid as the peat moss decomposes, water plants twice a month with 1 Tbsp. of dolomite lime per gallon of warm water in place of regular watering. If one tablespoon of dolomite lime is added to the above 1-1-1 potting mixture plus three tablespoons of granular, not powdered, charcoal (when one mix unit is one quart of each component) the pH will be about 6.8.
When you use various components in your potting mixture keep in mind what the component pHs will do to the overall mix pH. Here is a guideline to use but the pH of a material may vary:
Black Magic (6.4)
Mica Peat (6.2)
Redi Earth (4.4)
Daisy Prep (4.9)
Coles (6.4)
Envee (6.8)
Algit (Norwegian Seaweed 5.0)
Raw Bonemeal (6.8)
crushed or ground eggshells (8.6)
Greensand (potash 3.1)
Dolomite Lime (8.8)
Ground limestone (8.8)
Rock Phosphate (9.1) is not recommended as it may cause fluoride toxicity and damage your plants. A good starter mix for African violet leaves or small plantlets is 1 c. Vermiculite, 1 c. Perlite, 2 Tbsp. Charcoal and 1 Tbsp. Dolomite lime.
Emory Bronner’s potting mix is: one 4 qt. bag Black Magic African violet potting mix, one 4 qt. bag Envee African Violet potting soil, 2c. fine charcoal, 1c. bone meal, 1c. dolomite lime, 1c. ground eggshells, 2c. Perlite.
My potting mix is:
3 qts. Black Magic AV Potting Soil (pH 6.4), 2 qts. Mica Peat (pH 6.2)
A soilless potting mix can have slow release plant nutrients added to it. These components are raw bonemeal, greensand, Algit, and 3M Precise timed-release AV food 8-11-5. The above can be used in tiny quantities in potting mix in addition to a regular fertilizer program combined with watering. African violets are light feeders – don’t overdo it and spoil or kill your plants.
Keep your potting mix stored in plastic or metal containers which will keep the mix moist and prevent drying out. Most Club potting mix samples received for testing are much too dried out to be satisfactory for potting an African violet. Potting mix must be moist without being overly wet for best results. Beneficial bacteria in the peat moss need moist conditions in which to work and release nutrients or reduce fertilizer nutrient elements to soluble ions for plant use.
A pH testing kit is convenient for a preliminary check of your mix pH and also after lime has been added to raise pH. If the pH should be on alkaline side (above pH 7.2), you can either add more peat moss or finely ground sulphur.
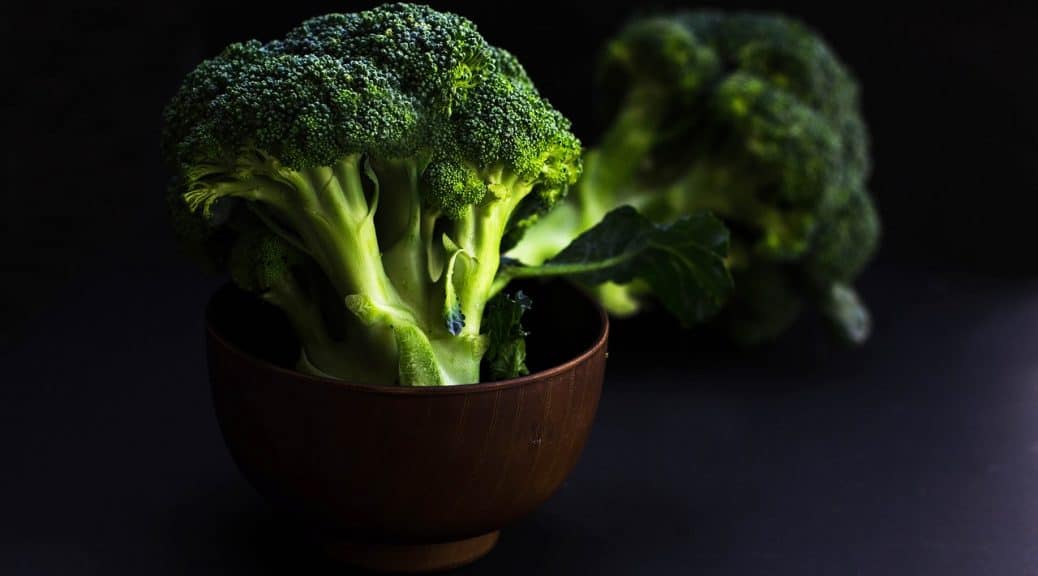
Among the many vegetables you can start from seed, consider starting broccoli indoors. You will not only love the delicious taste of fresh, homegrown broccoli but also benefit from its super health-promoting qualities.
For beginners, starting broccoli indoors might sound like a challenging task. However, the whole process is quite manageable and enjoyable when you have the right guidance. This step-by-step guide contains all the information you need to start broccoli indoors.
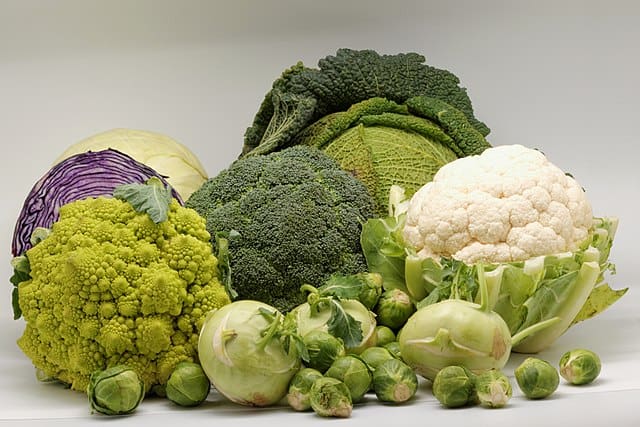
Best Broccoli Varieties to Start Indoors
Broccoli is from the family Brassica oleracea
As a brassica, broccoli is a member of the cabbage plant family. A few of the broccoli varieties for indoor starting include Waltham 29, Green Goliath, Calabrese, and Di Cicco. Notably, different broccoli varieties require varying lengths of time to grow. Starting broccoli indoors can be super fun, especially if you have kids around.
How to Start Broccoli Indoors
STEP ONE: SOW YOUR SEEDS
Prepare your pot
For convenience, start your broccoli in pots that can accommodate your plants right from sowing to transplanting.
Your pot (or any other container like disposable cups) should measure three inches in depth to allow ample room for root growth. Punch holes in the bottom of your pot for easy drainage. Remember, allowing water to collect around the roots will ultimately kill the plants.
If you opt to reuse old pots, remember to clean and rinse them using a mixture of water and bleach. This will help to kill any disease-carrying organisms.
Prepare a soilless potting mix
A soilless potting mix is weed-free. It promotes fast growth due to its fluffy and light texture. Put the mix in a container, and add water to make the mix damp (not soggy).
Transfer the mix into your pot, filling it to 1.25 cm (half an inch) from the top. Gently tap the pot to firm your mix.
Make a furrow using a pencil
In each make pot, the furrow should measure half an inch deep and an inch long. Sow between four and five seeds in each furrow.
Cover the seeds with the remaining mix and gently press down.
Label each pot with the sowing date and broccoli variety sowed in it.
Arrange your pots in a tray
Cover your pots loosely using a transparent plastic wrap. Covering helps retain moisture. Place the tray of pots in a warm location to promote fast germination.
STEP TWO: EXPOSE THE SEEDLINGS TO BRIGHT LIGHT
The moment you spot green leaves sprouting from the pots, uncover the tray by removing the plastic wrap. Expose the seedlings to a source of bright light. Adequate light makes the seedlings strong. Note that the first leaves will start forming between four and eight days after planting.
If you live in a sunny climate, place your tray on a windowsill facing the south. Give the tray a quarter-turn each day for even light exposure.
In darker climates expose your seedlings to an LED grow light. Optimal exposure lasts fourteen hours daily.
STEP THREE: CARE FOR YOUR SEEDLINGS
Avoid exposing your seedlings to high temperatures as too much heat makes them lush and soft. Therefore, a relatively cool daytime environment (between 60-65oF or 15.5-18oC) is recommended. At night, the temperature should be reduced by 10oF. You may opt to rely on ventilation systems. However, you must block any cold drafts from hitting the seedlings.
When watering, do it gently to avoid root disturbance. Use a watering can that provide thin streams. Alternatively, you can rest the pots in a tray with water, so it soaks into the pot from the drainage holes below.
Introduce a 5-10-5 liquid fertiliser once every week. The fertiliser must be diluted to half its strength.
Gradually thin your seedling. To do this, use a small pair of scissors to remove weaker seedlings. Ensure when the plants are almost 5 cm (two inches) tall, there is only one seedling remaining in each pot.
STEP FOUR: HARDEN YOUR SEEDLINGS
If you suddenly relocate your seedlings from their cosy indoor settings to harsh outdoor conditions, you will shock to your young broccoli seedlings. This will decrease your final yield and slow down the seedlings growth. Therefore, when you harden off your plants, you force them to toughen up to survive and grow under the bright sun, chilly wind, and cooler temperatures of your early-spring garden.
Hardening off means you stop applying fertiliser two weeks before you transplant your seedlings. Water after a day or two to discourage wilting.
A week before the hardening process, your seedlings should be in a cold and well-ventilated frame. The seedlings should be shaded to protect them from the scorching effect of the afternoon sun. At night, cover them from frost, or bring them indoors.
Gradually increase the amount of cold and heat (sunlight) to which you expose the seedlings every day. Water the seedlings only when the soil surface starts feeling dry. When your seedlings have grown 10-15 cm (4-6 inches) tall, they can are ready to be transplanted to the garden.
Changes in seasonal weather conditions affect how you grow your plants. This is especially the case with edible plants. However, growing plants indoors allows you to cultivate your favourite seasonal vegetables year-round without worrying about unfavourable conditions that could destroy your plants. While the list of plants for indoors can be long, we have narrowed down our search to edibles only. This will not only ensure you cut down on food waste but will also give you year-long access to your favourite fresh-from-the-garden vegetables.
Whether you are a farmer or a semi-experienced gardener with little or no indoor cultivation experience, you will see how easy these plants are to maintain. From aromatic scallions to zesty peppers, read on to discover our top picks for the best plants for indoors.
A Few Tips for Growing Edible Plants Indoors
Be sure your plants have good drainage. You can pile stones at the bottom of your pots before adding your soil mix, or use pots with holes.
Provide your plants with the right amount of exposure to light. LED grow lights are a reliable alternative to natural sunlight. These artificial lights are preferred since they provide optimal temperature and light for your plants regardless of the indoor or outdoor weather conditions. This article has a great round-up of grow lights available on the market and how to choose the best one for your growing situation.
Tomatoes are among the best plants to grow indoors. These should be placed in the sunniest or brightest part of your indoor garden. Sow the seeds deep within the soil mix in the seed tray. Transplant the seedlings into a larger pot the moment they develop their first four true leaves. You may grow your plants upside down if you do not want to stake them. Remember to pinch the small branch tips so as to induce flowering. You may also need to provide additional artificial lighting to boost growth and productivity. It is worth noting cherry tomatoes yield better under indoor conditions than larger tomato varieties. Read our article about growing organic tomatoes indoors.
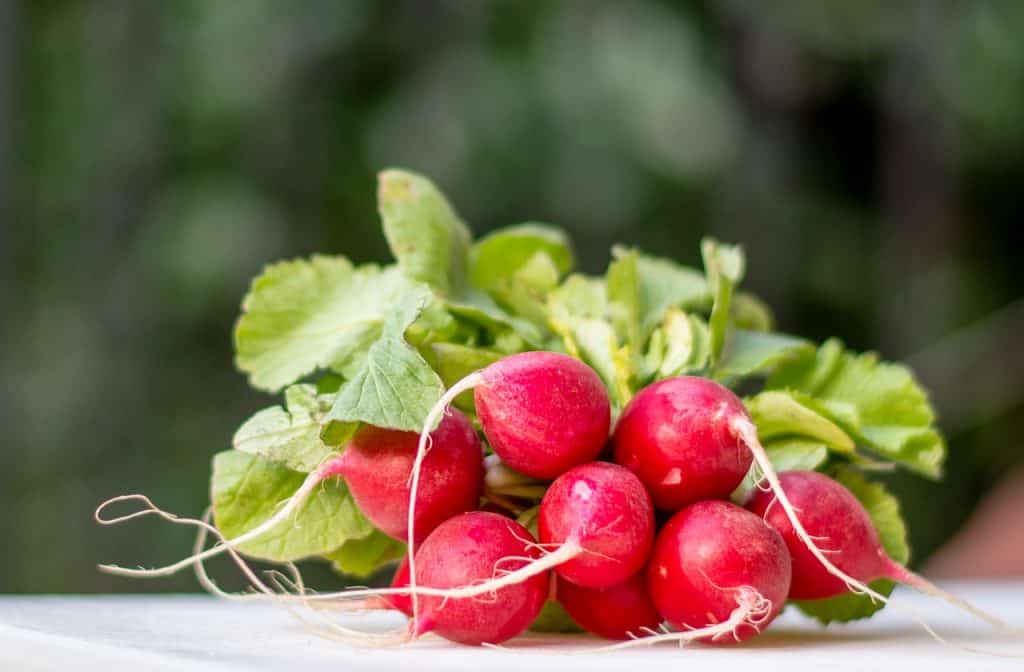
2. Radishes
Among the top plants for indoors, growing radishes indoors is easy and rewarding, especially during winter. Within 25 days, the radishes will have developed into table-worthy tubers with a steady weekly back to back batch supply. They have a slightly spicy flavour that complements winter dishes.
Radish seeds need to be sowed 5” deep in your potting mix. Cover with plastic foil until the seedlings sprout. When the cotyledons appear, you can move your plants to a spot where they can access light. Thin the plants when they develop between three and five true leaves.
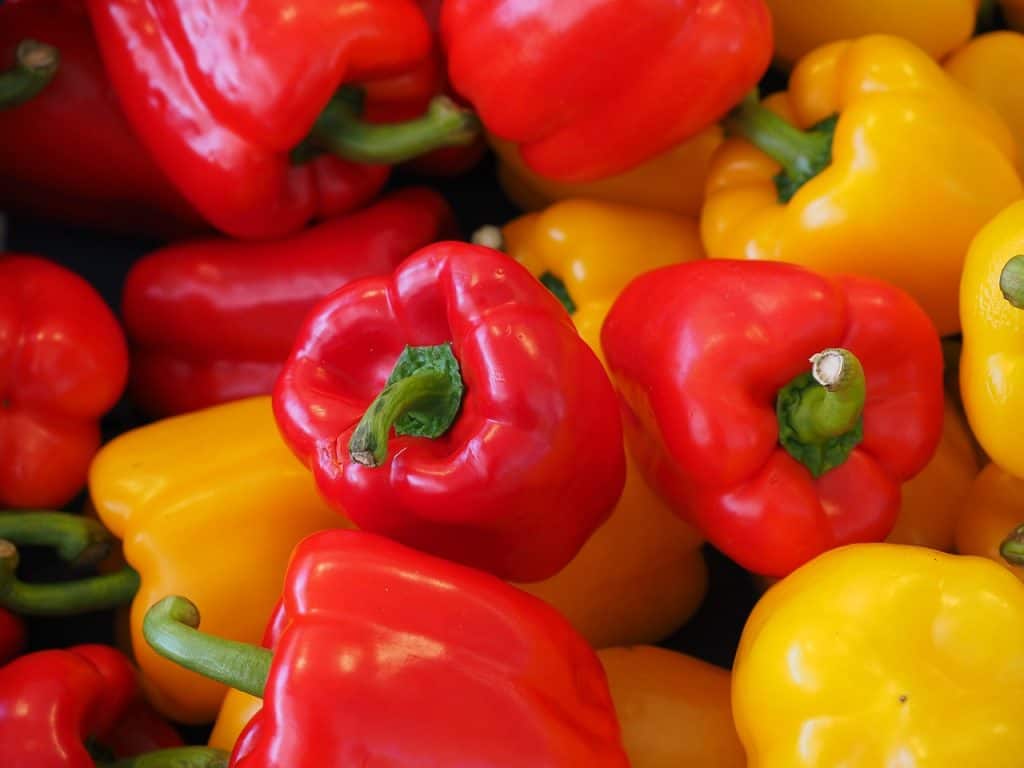
3. Bell Peppers
Bell peppers perform well under adequate lighting conditions. Their yields increase if they are cultivated in a rich potting mix with sufficient drainage. Trigger bushy growth can by pinching the growing tips. This later translates into good fruit sets.
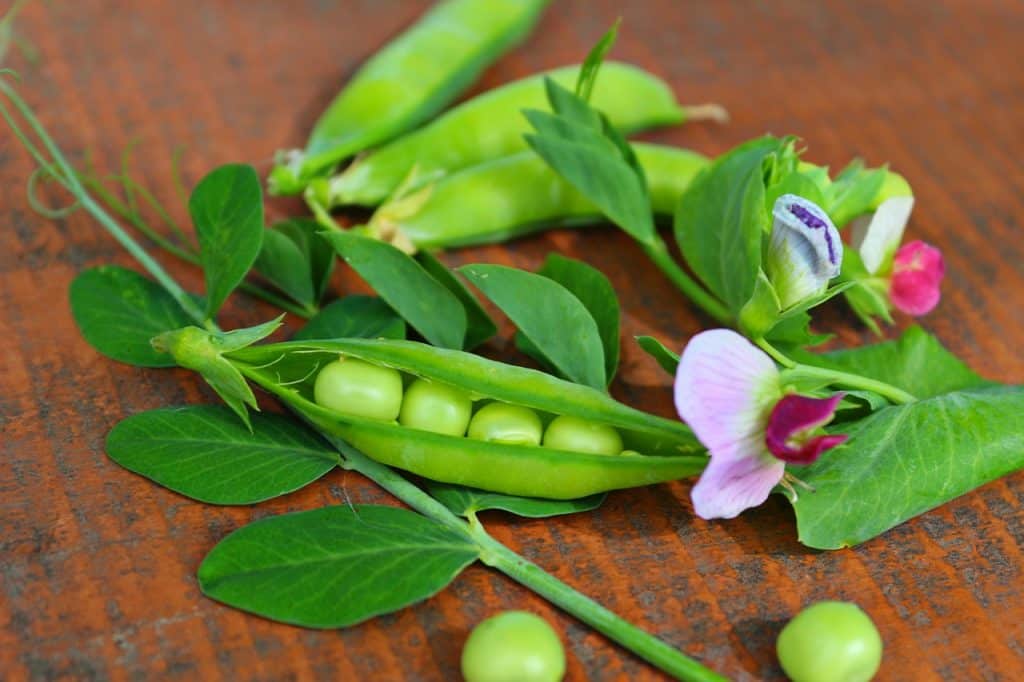
4. Peas and Beans
Consider cultivating peas and beans if your indoor conditions have ample light. The pod yield will be good if you plant bush beans which do not require any staking or support. Harvesting peas and beans is considerably easy.
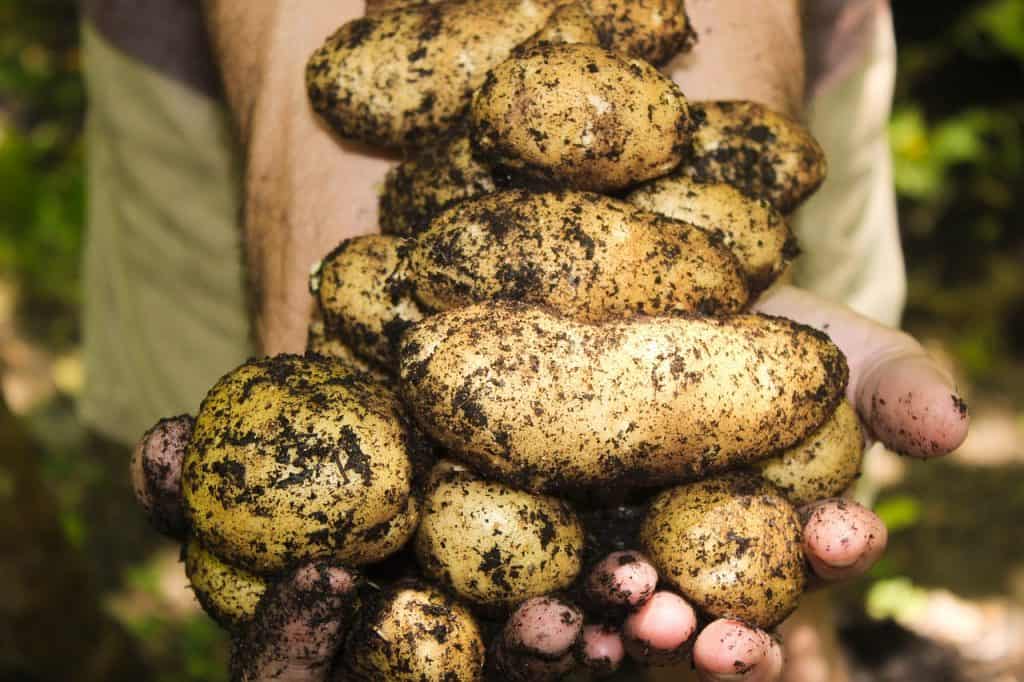
5. Potatoes
Growing potatoes indoors requires large plastic bags. The bags must be filled with the right potting mix before you can plant your potatoes in them. Ensure your plants get a minimum of 5 hours of exposure to light each day for satisfactory yields. Baby spuds from your plants can be cooked as you anticipate tuber maturation.
You will need to plant several plants if you want to harvest enough for a dish. Choose potato varieties known for high yields.
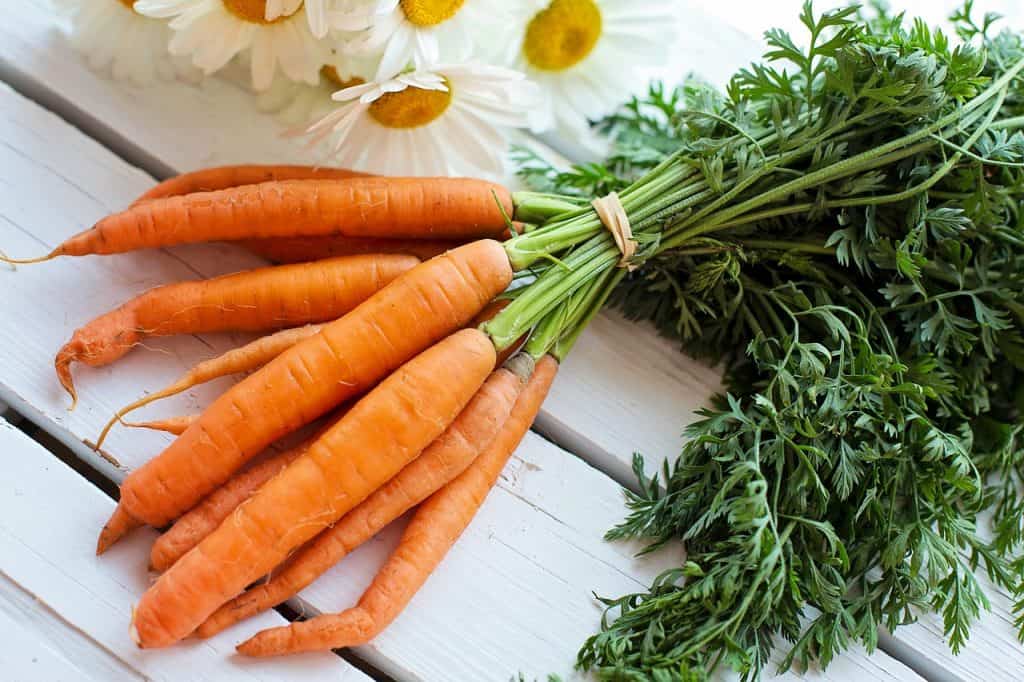
6. Carrots
Plant your carrots in deep pots with good drainage and loose soil. In addition to giving you a steady supply of food, the fern-like, feathery greens are delightful interior decorations for your home. Provide 4-5 hours of grow light or sunlight to ensure a good harvest. However, if you compromise the quality and quantity of light, your plant roots will develop for longer.
For indoor cultivation, select round carrot varieties and plant the seeds with considerable distance from each other to allow adequate room for root development. Cooler spots will give you sweet-tasting carrots. Carrots are ready for harvest the moment you see their tops above the potting mix.
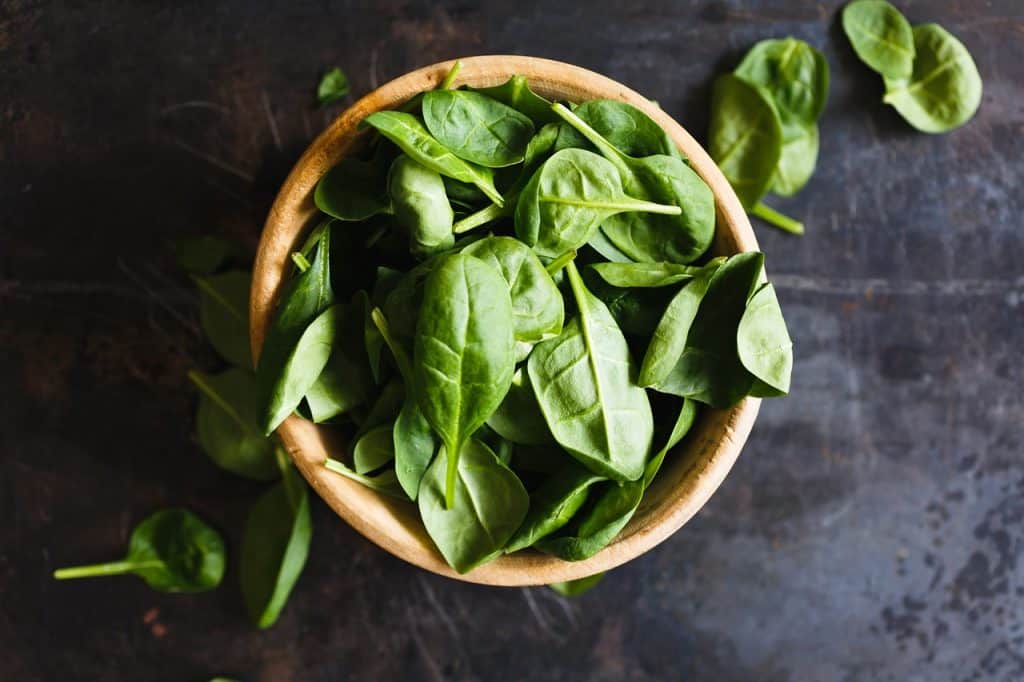
7. Spinach
Just like in outdoor cultivation, spinach grown indoors does well under partial shade. Be sure to replicate this shade in indoor cultivation for a continuous leaf supply. Expose your spinach plants to sunlight or a LED grow light setup for a maximum of 4 hours on a daily basis. You should grow spinach in a cool area to avoid bolting.
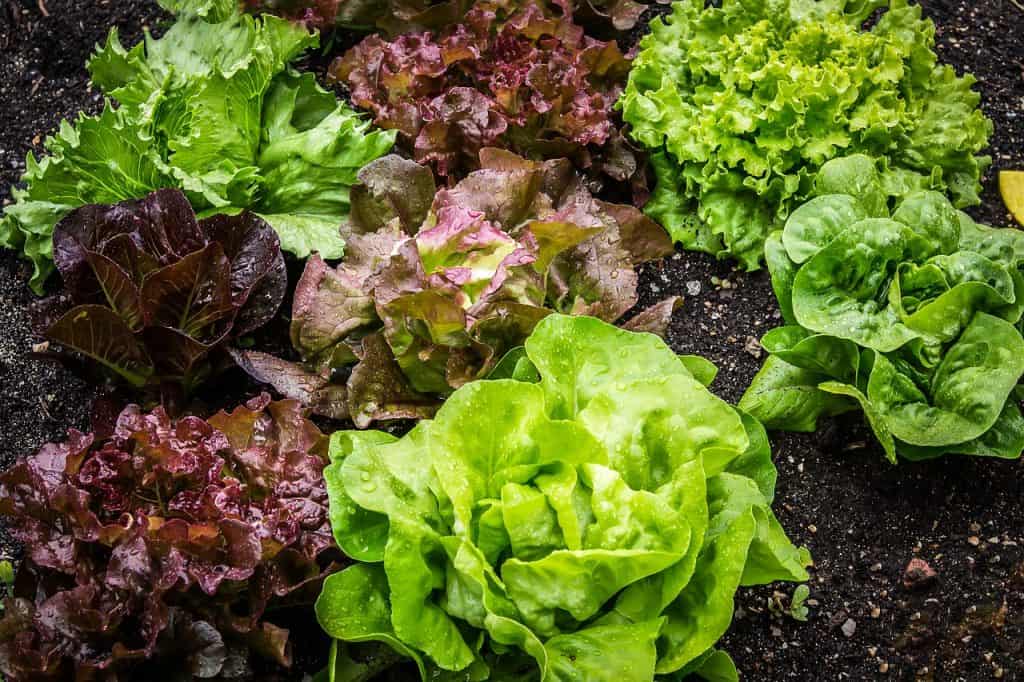
8. Lettuce
While many different lettuce varieties do well grown indoors, the loose leaf varieties are our recommendation. All lettuces require optimal exposure to dappled light for 3 to 4 hours. For a continuous harvest, pick only the outer leaves. Lettuce needs to remain moist so be sure to water frequently.
9. Swiss chard
Expose your Swiss chard plants to light for 4 to 5 hours a day to develop long rainbow-colored stalks. While indoor cultivation will give you smaller plants, your stir fries and salads will be bold and beautiful with these plants growing through the dark winter. You will also love the colourful ambience they add to your home.
10. Arugula
As a salad green with a sharp taste, Arugula’s yield is better when cultivated indoors. This plant grows more when you cut it, giving you a continuous leaf supply. Avoid warm spots, so this cool-season plant offers an extended harvest with little bolting. Unlike lettuce, arugula doesn’t like to be over-watered.
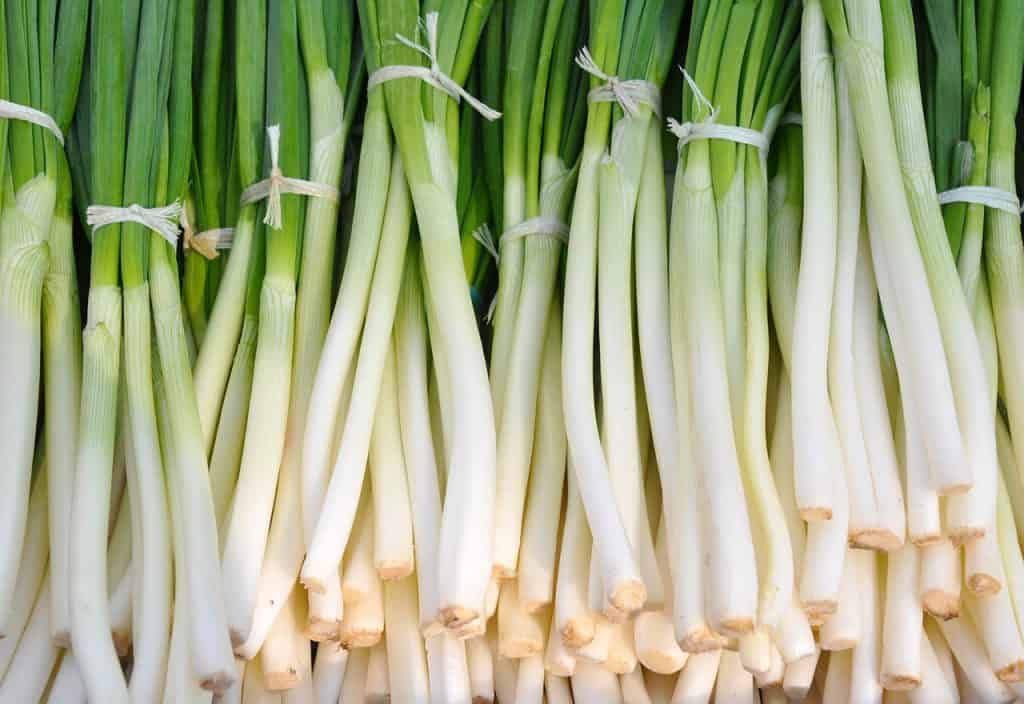
11. Scallions
Scallions are part of the bunching onions family, grown for their leaves. When cultivated indoors, their greens can be snipped off for use. Scallions can be planted from in-season sets or seeds. You can also use the small scallion bulbs available in shops to develop new plants. Ensure your pot is wide and deep since your onions will grow deep roots as their clump sizes increase quickly. Further, you should be sure to use a potting mix with good drainage. Water your plants frequently for maximum yields.
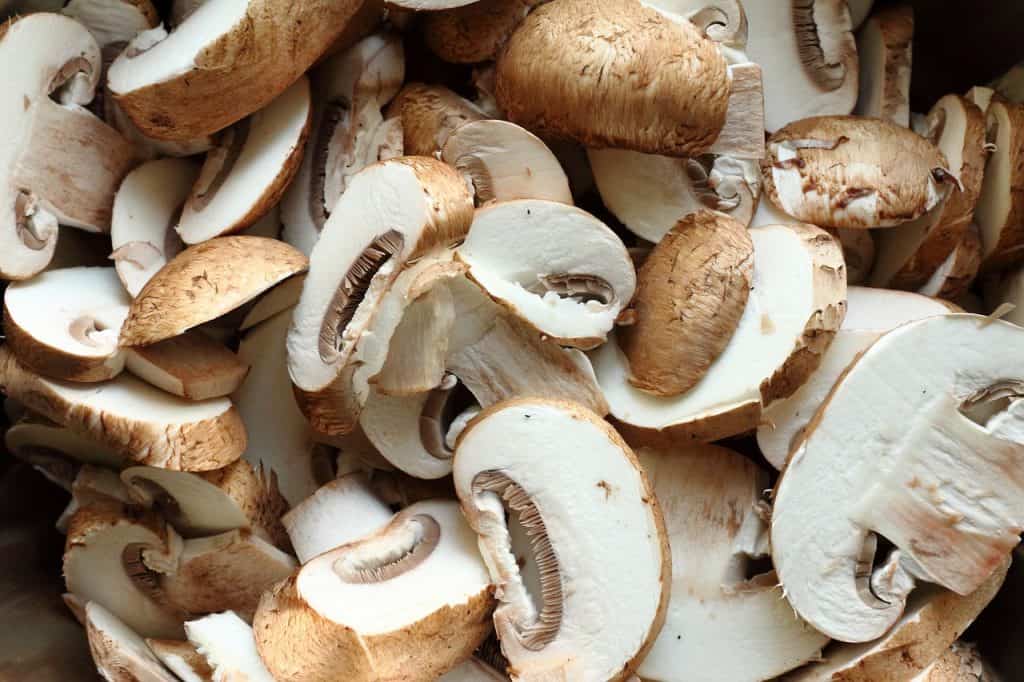
12. Mushrooms
Mushrooms are exciting to grow indoors. Use ready-made kits for simple oyster or button mushroom cultivation. Water the growing medium as instructed and keep your plant in cool and dark conditions for the best development.
Have you learned any indoor growing tips? We would love to know your favourite vegetables to grow indoors. Feel free to share in the comments section below.
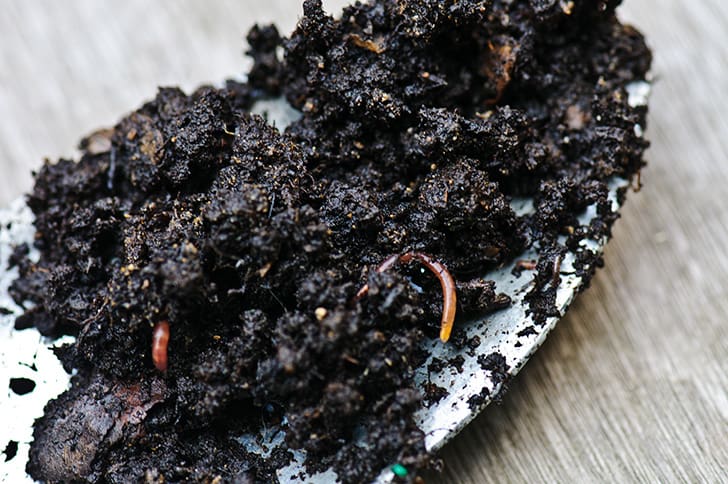
After years of year-round growing, I have a wealth of experience on how to starts seeds indoors; I also have sad memories of my initial failed attempts. Over time, I have learned that planting seeds indoors is easy; keeping them alive is a challenge. Equally, growing seeds indoors helps you save money, but you only gain the benefits when the seedlings live and develop into healthy plants.
Starting seeds indoors is a practical approach to getting a jump on your gardening activity early in the season. Planting seeds indoors implies controlled growth conditions, the absence of aggravation from unfavorable weather or weeds, and an early start to the gardening season. Whatever your ultimate goals are, whether it is to grow lettuce during early fall, squash in summer, or onions as winter closes, developing the right skills on how to start seeds indoors is necessary.
A general pointer is to start off small and keep it simple. Every plant has unique requirements in starting its seed. Don’t start with too many different varieties. My favorite seedlings to start indoors for beginners are:
Marigold
Tomato
Nasturtium
Coleus
Zinnia
Equally, ensure your timing is right. The objective of growing seeds indoors is to transplant the seedlings from indoor pots to outdoor gardens the moment the weather is favorable. With these pointers, you are ready for our 6 tips for growing seeds indoors. Let’s go!
1. Choose the Right Container
Starting seeds does not require special containers. In fact, anything that measures two to three inches deep with drainage holes is appropriate. If you firmly believe in DIY techniques, then you will find paper cups, milk cartons, and yogurt cups perfect for upcycling.
However, individual trays designed for seed starting are highly convenient. These trays are easy to fill, and they ensure consistent moisture due to their watering system. They can also be moved around more easily.
Sow your small seeds into shallow seed trays, bigger seeds in a modular plug tray where each seed has its module, and large seeds into 9cm diameter pots.
2. Prepare your Compost or Potting Soil
Rich compost is perfect for seed starting
Your potting soil will determine your success in planting seeds indoors. It is advisable to use standard and proprietary soil-less or soil-based seed compost when sowing your seeds indoors. The compost should contain few nutrients and be finely milled to minimize seed damage. Fill your container with the compost. Firm gently, level, and water the container accordingly.
Avoid reuse of previous houseplant pots as well as soil from the garden. I recommend a fresh and sterile mix for disease-free and healthy seedlings. Use a tub or a bucket to moisten your potting mix. Avoid making the mix gloppy and sopping wet.
3. Sow Your Seeds
Determine the form of sowing treatment appropriate for your seeds. This could be scarification through nicking or scratching their seed coats, or light exclusion. Each seed packet includes planting instructions.
Scatter-sow small seeds over the compost surface. If your seeds are tiny, you can mix them with sand before scatter-sowing to ensure that they are evenly distributed. Then, sift a compost layer over your seeds.
Station-sow larger seeds by pressing individual seeds into the compost surface while placing them one inch apart in your seed tray. Or, sow each seed in a separate plug if you decide to use a modular plug tray. You can opt to plant two seeds in every plug and discard the weaker seedling upon germination.
Label each tray, water lightly, and cover the compost with plastic domes or wraps. You can also place your tray in a heated propagator designed with a lid. A constant temperature of about 64F (18C) should be maintained unless stated otherwise on the seed packet. Covering and providing heat triggers germination through keeping the seeds moist.
Check to see if your seedlings have emerged on a daily basis. Once germinated, enhance ventilation by removing the propagator lid or plastic wrap. Ensure the compost is moist throughout to promote steady growth before the seedlings are ready for transplanting into bigger pots.
4. Water and Feed your Seedlings
While your seedlings are growing, keep the compost moist with a small watering can. The soil should be allowed to dry before you water again. You may use a fan to promote good air circulation and plant health. If you use grow lights, plug your fan into the same timer. You also need to feed your hungry seedlings with liquid fertilizer regularly. Use mixture ratios suggested on the seed packet.
5. Provide Adequate Light
Seedlings require a lot of light to avoid being weak and leggy. For natural sunlight, southern windows are the best. Remember to rotate your pots regularly, so the plants do not lean into the direction of light. You can also use grow lights which are easily adjustable for sufficient and consistent light. Place the lights a few inches above your seedlings and illuminate for fifteen hours on a daily basis. You should then turn off the lights to give your plants darkness during which they can rest. Raise the grow light higher as the plants grow taller.
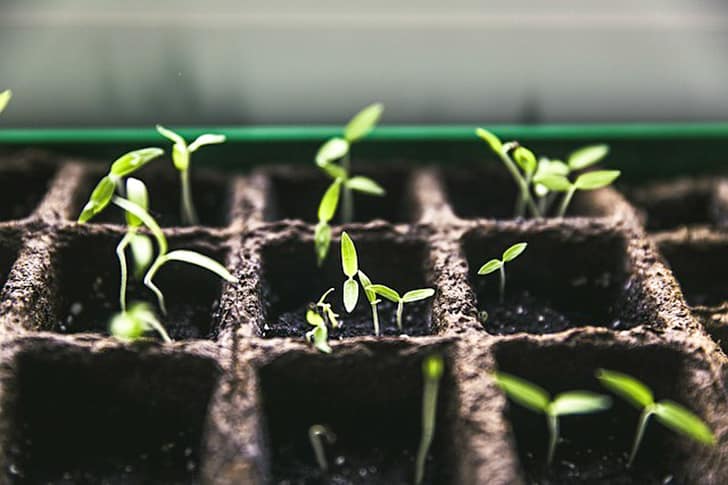
6. Transplant your Seedlings Gradually
transplant your seedlings when the true leaves begin to show
Prick out your seedlings by loosening the compost around the roots. Lift each seedling by individually holding its true leaves. Ensure you retain as much compost on the roots as possible. Use a dibber to prepare a hole for your seedlings in their new compost pots. The seedlings should be transferred into 3.5-inch diameter pots.
Keep watering the plants gently, so you do not damage them. As the plants grow large, try flooding while watering, so the entire compost depth is soaked. Liquid fertilizer should be applied every two weeks to a month, although weekly application is recommended for larger plants.
Encourage branching in thin ornamental seedlings by pinching out their shoot tips. Avoid overly warm and bright conditions to discourage plants from growing leggy.
When the plants are ready following weeks of care, you may proceed to the hardening off stage. A week before their final outdoor planting, nurture your plants in a protected outdoor spot. Expose your plants to gradual sunlight over seven days. Consider hardening your plants off in a cold frame.
Harvest your new crops!
Things to Watch Out For
If your seedlings rot, it could be a sign of overwatering
Fertilizer and water shortages trigger plant stress
Lack of feed triggers pale, lower leaves
drought stress triggers dull foliage
However, if you follow the above tips, chances are you will get healthy and vigorous plants from your seeds.
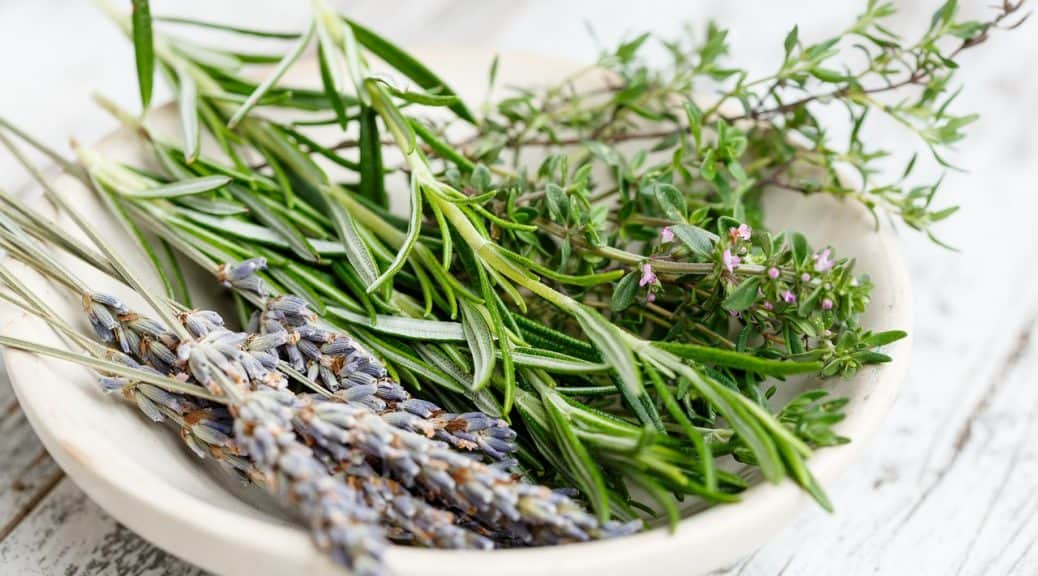
10 Best Herbs to Grow Indoors and How to Grow Them
Picture this – beautiful and aromatic mounds of kitchen herbs lining the sills of your sunny windows just waiting to be picked. Would you love to make this a reality? If yes, we are here to offer a helping hand. We will walk you through how to grow herbs indoors and the best herbs to choose for your indoor garden.
With this guide, you can keep a steady supply of fresh herbs in your kitchen throughout the year. What’s more, we’ll provide tips on planting herbs indoors to ensure you understand which herb varieties thrive on your window sill or under your indoor grow lights.
For the best results, we suggest you plant each herb variety in its own pot for customized care and ample room for growth. The following are our picks for the best herbs to grow indoors.
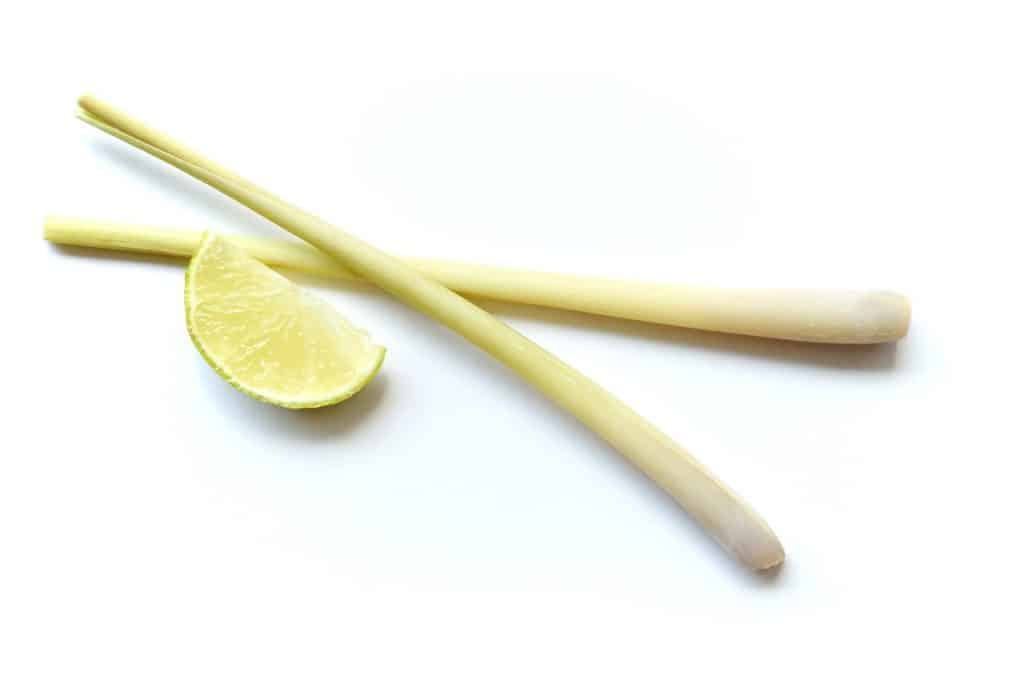
1. Lemongrass
Technically, you don’t even have to plant lemongrass as it doesn’t require potting mix, making this herb incredibly easy to cultivate indoors. Simply identify a stalk with plenty of stem at your local market. Ensure your stalk of choice has an intact base. You need to trim its top before you dip it into a couple of inches of water. The stalk will develop roots and subsequently give you dozens of new lemongrass shoots.
2. Chives
Chives are among the best herbs to grow indoors as they don’t require a lot of light to thrive. You will ultimately love this herb’s prolific production. For ease of cultivation, start your chives from a mature plant. Just pull up a bunch of chives with their roots from an already-established plant and start them in a half-full pot. Ensure you cover the roots with rich organic soil to the crowns. To stimulate growth, cut off about a third of the upper part of your plant.
3. Mint
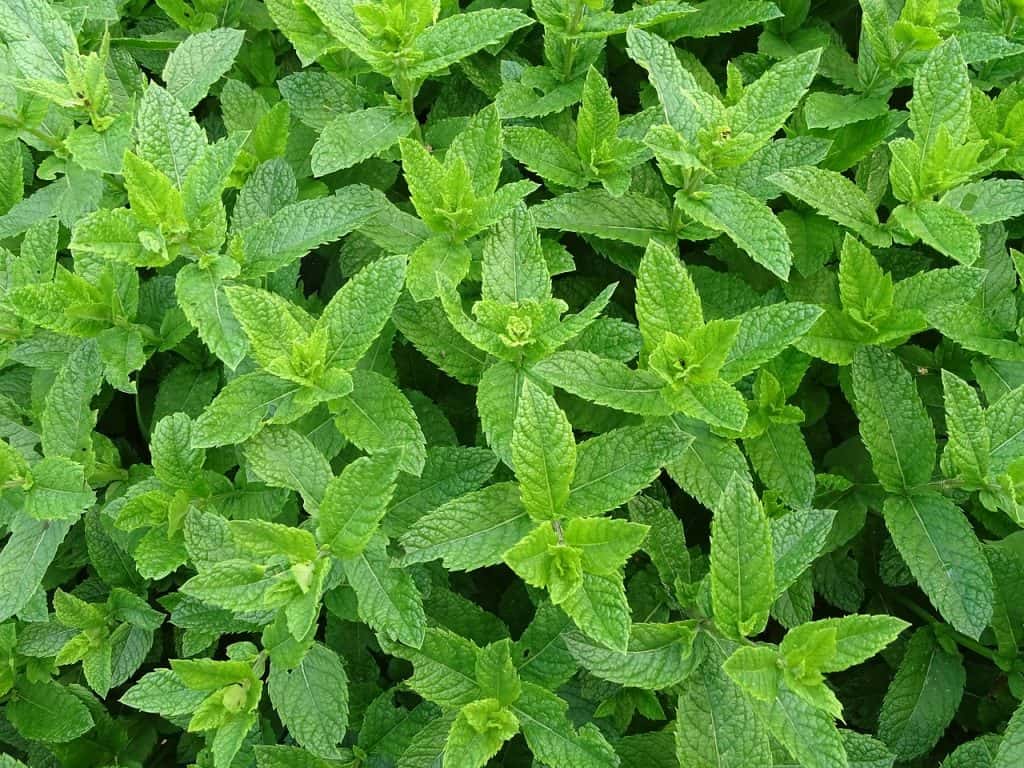
Peppermint and spearmint grow like weeds. In fact, they are highly invasive and tend to choke out other plants, making them perfect candidates for a container garden. We recommend you settle for peppermint if you do not have a lot of cultivation space. Start your mint plant with seeds as opposed to the leaf or root cuttings. Plant your seeds directly into a small pot full of moist potting soil. While mint thrives well in the shade, ensure your plant is exposed to moderate light on a daily basis. Keep your mint well away from your other herb pots, or you may find an invader in your indoor garden.
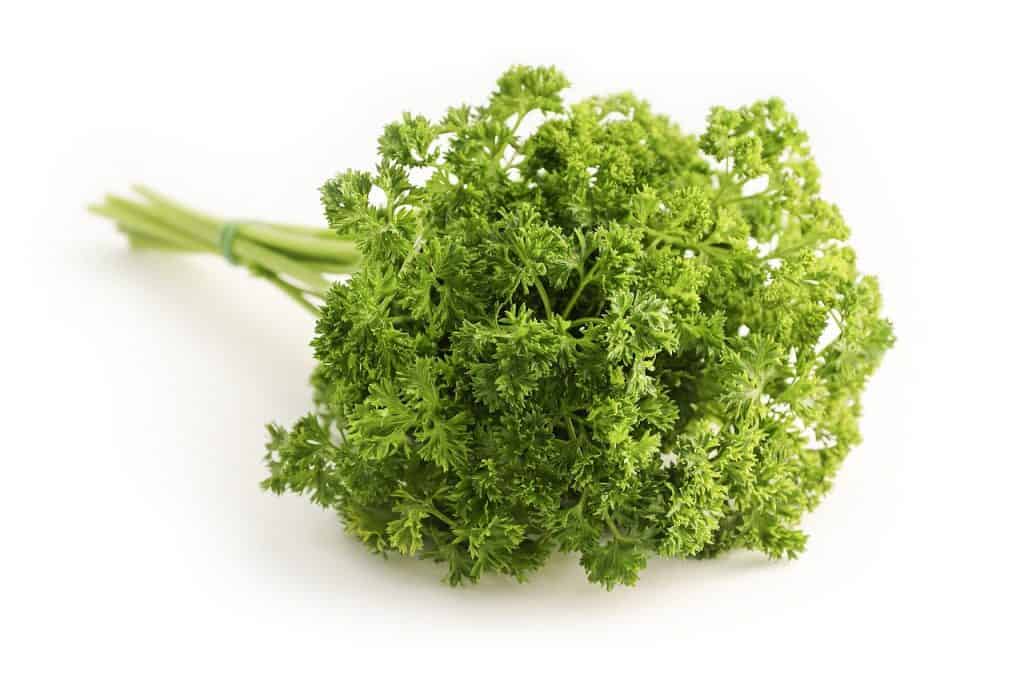
4. Parsley
As a commonly used and easy herb to cultivate indoors, parsley takes a prime spot in our guide to planting herbs indoors. You should note parsley seeds are difficult to germinate and you might need to give them up to two weeks for noticeable results. This is compensated with the ease of maintenance once they germinate. Parsley requires moderate light to thrive. Due to its slow growth rate, initial clippings might not give you the desired harvest. While the plant might require frequent watering, you should ensure the soil surface is dry before watering again to avoid wilting. Also, use rich organic soil for the best results.
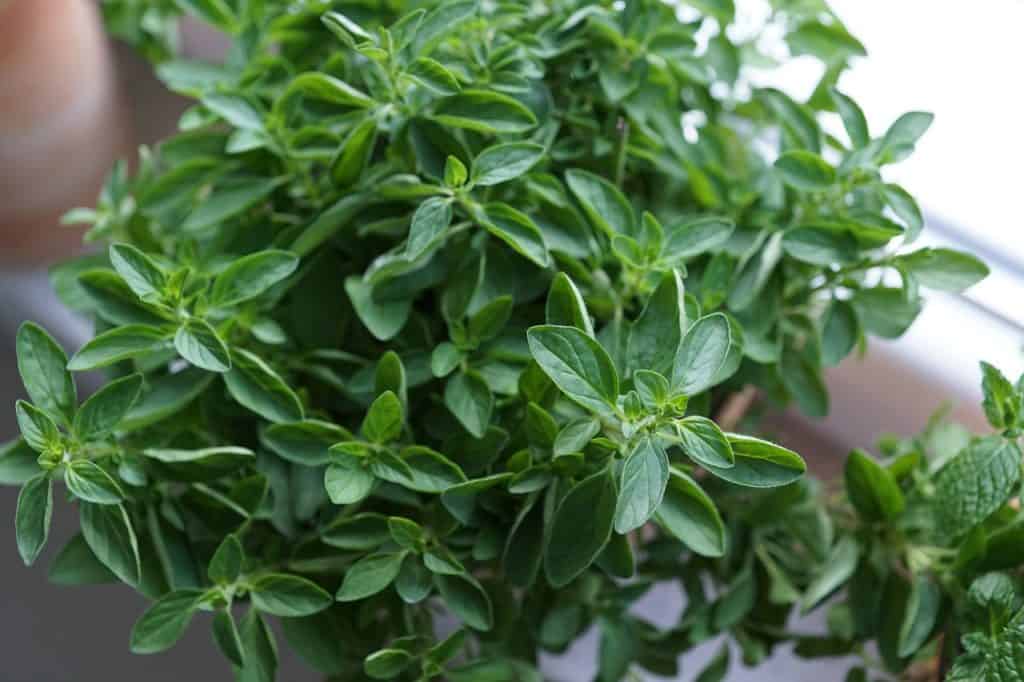
5. Oregano
While there are many different types of oregano, the Greek variety is the best for indoor cultivation. However, all varieties thrive well when exposed to light for six to eight hours. Consider artificial lighting or placement near your southwest window for moderate illumination. Water the plants the moment the soil surface dries. The soil should never dry out completely.
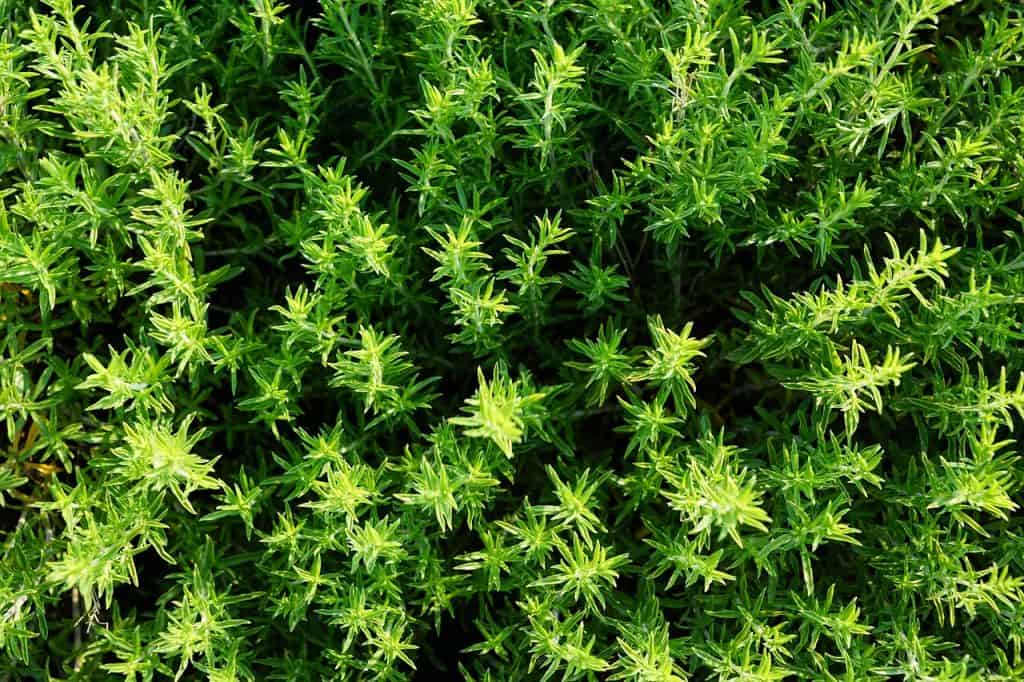
6. Thyme
Just like oregano, thyme thrives when exposed to light for six to eight hours on a daily basis. When extra light is provided, the results are even better. Replace regular thyme with lemon for an unusual citrus-like flavour that is great in seafood dishes.
Cultivate your thyme in a fast-draining potting mix and place your pot in a warm and bright location. Water the plants the only when the soil surface dries, but be keen to avoid wilting.
7. Rosemary
If you are planting herbs indoors, do not rosemary. You do not have to worry about watering it very often or getting a rich potting mix. It comes in numerous varieties; while some develop as creeping plants, others are bush-like. We recommend upright varieties such as Blue Spire or Tuscan Blue which are known to retain their compact nature making them appropriate for indoor cultivation.
You must provide strong light in winter so your plants can do well under cool temperate ranges (between 40 and 65 degrees Fahrenheit). However, the plant can tolerate the hot, sunny, and dry weather during summer.
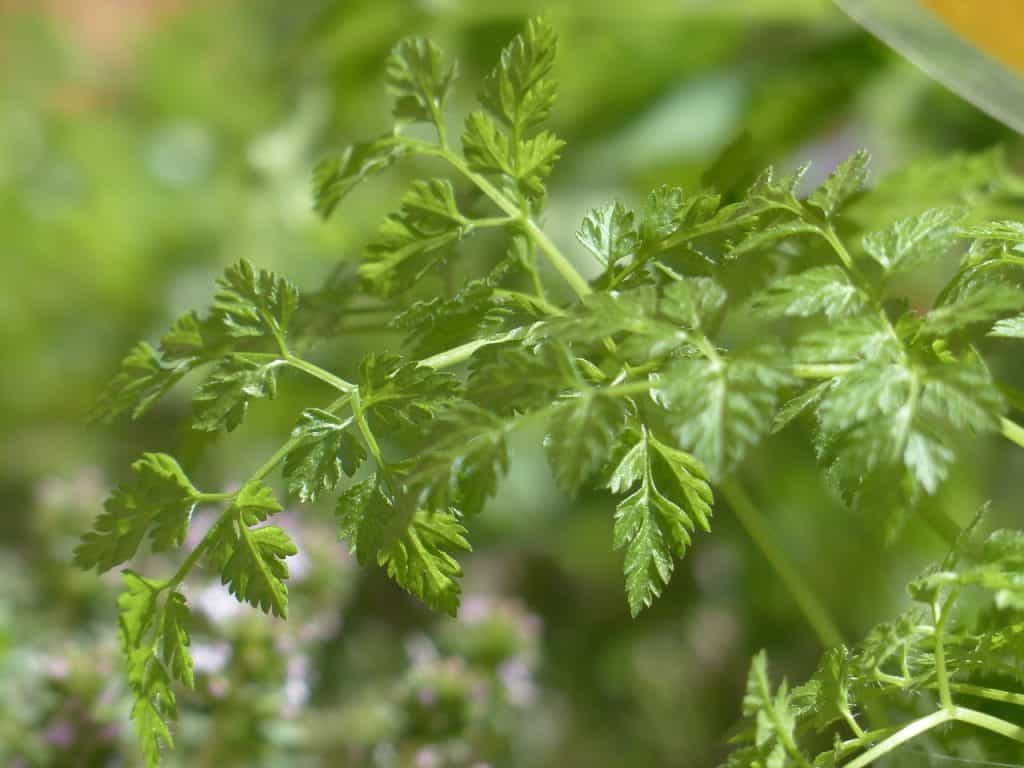
8. Chervil
You will need chervil to prepare your traditional blend of fines herbes. Chervil is known for its anise-parsley flavour. Start your chervil seeds in a moist potting mix. Ensure you use deep pots to enable the development of the plant’s taproot system. Upon sprouting, provide cool temperature conditions between 60 and 70 degrees Fahrenheit with moderate light. For a continuous supply, replant chervil every few weeks.
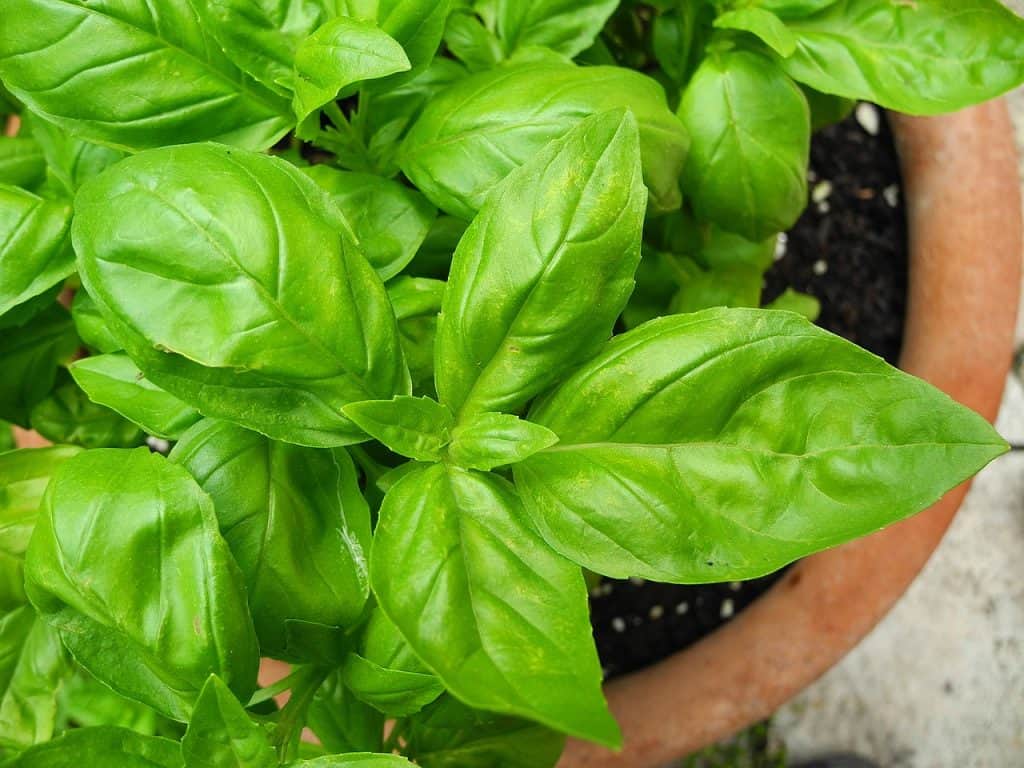
9. Basil
Planting basil indoors can be rewarding, particularly if you choose the African Blue or Spicy Globe varieties. African Blue does not yield wide and bright-green leaves like traditional basil but has bluish-purple stalks and narrower leaves, similar to a Thai basil.
Basil loves bright light and heat. Therefore, indoor grow lights, or a western or southern window will enhance its growth. Avoid drafty and cool spots during winter. Since basil is not a long term herb, you can only use and keep it for a few weeks before the stems grow woody. Planting new seed batches every few weeks can ensure you have a steady basil herb supply.
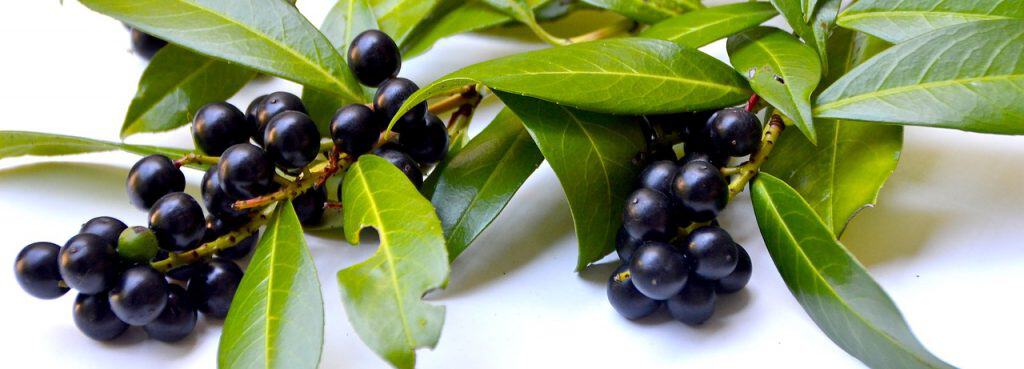
10. Bay Laurel
Bay Laurel is a Mediterranean shrub with thick flavoured leaves that are an essential stew and soup ingredient. For the strongest flavour, pick the oldest leaves from your plants. This herb grows well when planted in a fast-draining potting mix. Expose your plants to moderate to strong light daily. Ensure the plants have good air circulation which is essential to keeping them healthy and disease-free. Use neem oil to prevent disease outbreaks.
Enjoy planting your favourite herbs from our list indoors all year round. If you have to purchase herbs to cultivate indoors, ensure you get those that have previously been grown indoors. Plant each herb in its own pot. Remember to use a rich organic potting mix with good drainage. Planting herbs indoors has never been this easy and enjoyable. Try it out today!